Instant Pot Bottom Round Roast
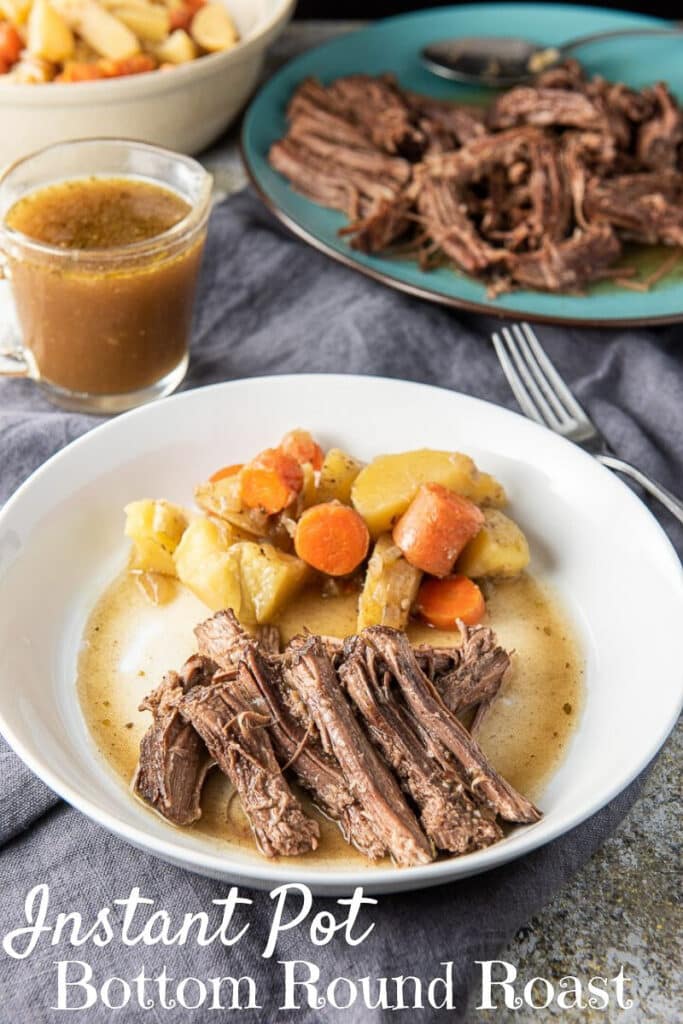
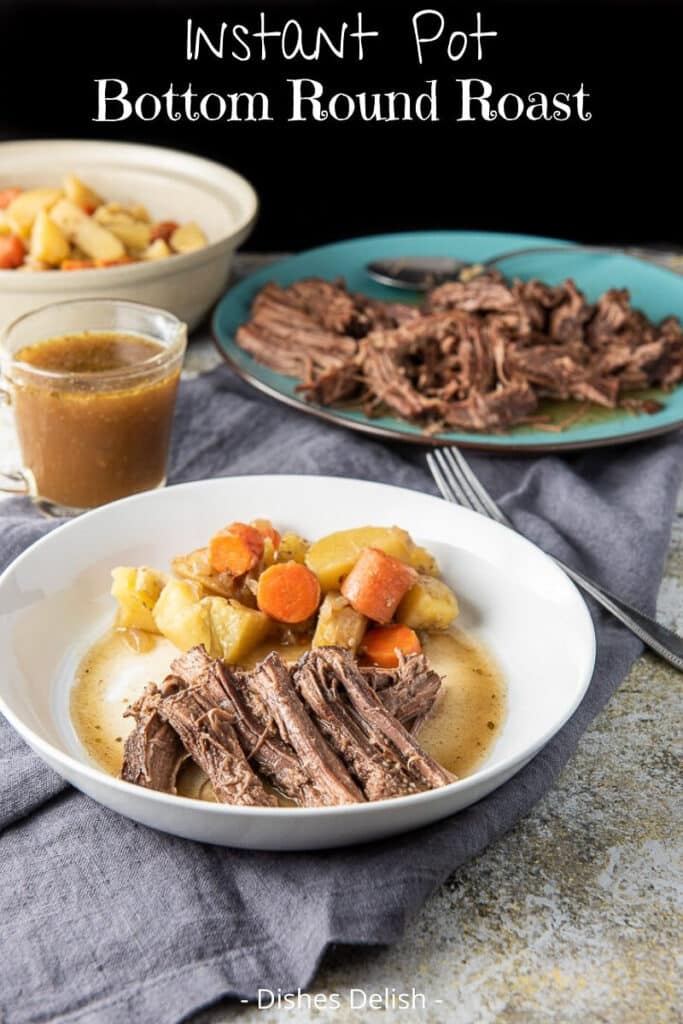
One of the things I love about this instant pot bottom round roast recipe is that there is hardly any work involved. Thanks to your pressure cooker, the meat turns out moist, the gravy is tasty and the vegetables cook directly with the meat, which gives them great flavor.

This post may contain affiliate links, which means I get a small commission, at no additional cost to you, if you click the link and buy something. You can read my disclosure here.
I am an affiliate for ButcherBox and although this is not a sponsored post, I do get a commission if you sign up through the link I provide.
If you’re not familiar with ButcherBox, they are a subscription service that delivers 100% grass-fed beef, free range chicken, heritage pork and wild-caught Alaskan sockeye salmon right to your door. Everything you order comes in an eco-friendly, styrofoam-free, insulated box.
You don’t have to worry about the meat going bad because it is packed with a big piece of dry ice that keeps everything frozen solid.
ButcherBox products are affordable, too – they claim the cost is less than $6.00 per meal – and you can rest assured that the meat/fish you are getting is quality and delicious.
Check out their website to see what they offer and how easy it is to order your own butcherbox. You can customize to get a mixed box of beef, pork and chicken; a pork and beef box; a beef and chicken box; or all-beef box.
In this Instant pot bottom round roast recipe, I use their grass-fed bottom round roast. And boy, is this meal scrumptious!
Ingredients and substitutions
- Olive oil – I use organic, extra virgin. If you have a preferred sautéing oil, you can use that instead.
- Bottom round roast – There are many different cuts of beef you can use. I prefer round roasts myself, but any of the chuck roasts would work as well.
- Salt – I use kosher to salt the roast.
- Pepper – Hubby doesn’t love pepper, but I do, so I only use a little in the recipe. Use as much as you like to suit your tastes.
- Onion – Vidalia is my favorite onion because of its slightly sweet taste but a yellow onion would work as well.
- Carrots – I use organic and wash them with a vegetable brush but I do not peel them as I like the nutrients in the peel. But you can peel them if you prefer.
- Potatoes – I use Yukon gold because they are so creamy in texture but use whatever potato you prefer. I wash the potatoes with a vegetable brush and do not peel them.
- Celery – Just one stalk to help flavor the broth.
- Beef broth – I use organic Trader Joe’s broth. It is both delicious and affordable.
- Red wine – Wine and beef go well together and red broth flavors the broth so wonderfully.
- Rosemary – Fresh. You can find it in little packages in the produce section of the grocery store.
- Sage – Fresh. You can also find this in the produce section in the grocery store.
- Oregano – I used dried organic.
Helpful tips
- According to this awesome guide from the people who made the Instant pot, allow 20 – 25 minutes of cooking time for your roast per pound.
- The Instant pot takes a good 15 – 20 minutes to come to pressure. I do not include that time in the recipe timing but know that the meal will usually take 30 minutes longer than stated. The reason I don’t add the time is because each recipe is different and it depends on how full the IP is.
- After the meat has cooked for 60 minutes, you are going to let the IP release the pressure naturally. You won’t have to don the oven mitt but make sure the silver pressure button has dropped down to its resting position before you remove the lid.
- After the vegetables have been cooked, you can do a quick release on the IP, make sure you stay safe by putting on an oven mitt before moving the venting knob from the sealed to venting position. Keep your hands and face away from the steam as it will scald you.
- If your cut of beef is especially fatty, make sure to cut off as much fat as you can so you don’t finish with overly fatty gravy.
- I don’t make a traditional ‘gravy’ with a flour slurry – so I call the juice and broth that is cooked with the meat ‘gravy’. I prefer that over making a flour based gravy.
- The meat and gravy freeze well. Just make sure to store them in airtight containers and mark the date when they go into the freezer.
- Got a frozen roast? You can add 20 – 30 minutes to the initial cooking time.

How to make instant pot roast
Pre-step
Get your Instant pot or pressure cooker.
Step one
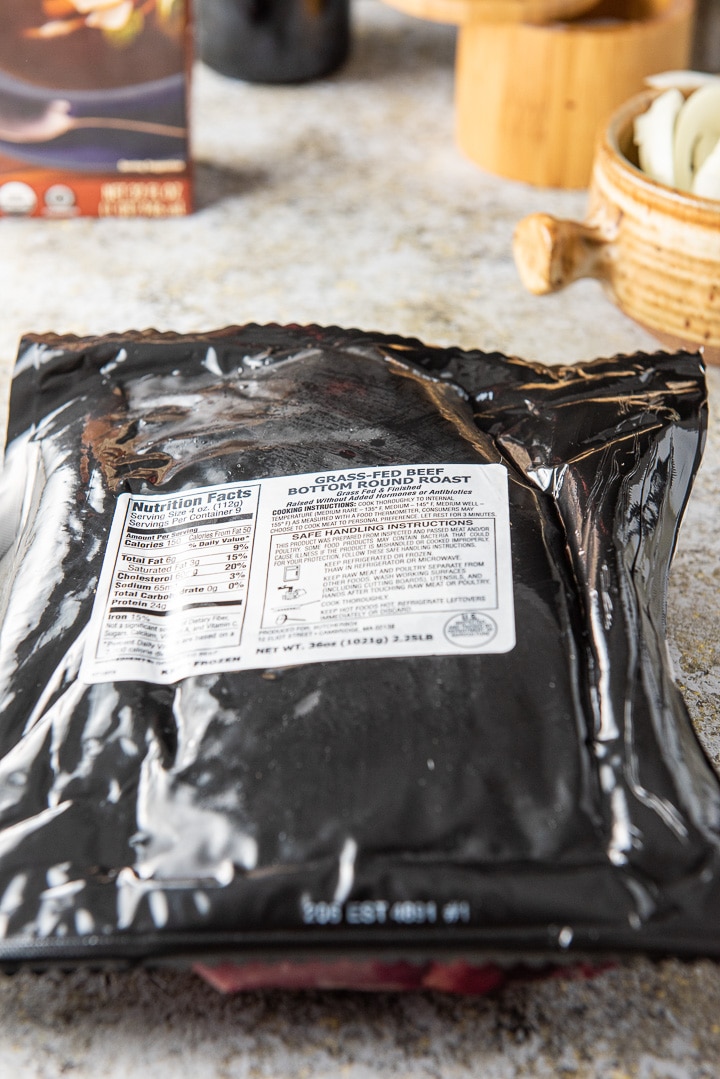
Gather the ingredients – bottom round roast, onion, beef broth, red wine, salt and pepper.

Here is the other side of the bottom round roast package.
Step two
Take the roast out of the packaging and sprinkle kosher salt and pepper on both sides. (A)
Step three
Plug the instant pot in and press the sauté button. Once it heats up (it should read hot on the display), add olive oil and once that heats up, place the roast fat-side down and sauté for three minutes, flip and sauté the other side for 3 minutes.
Press the cancel button and remove roast from the insert. (B)

Step four
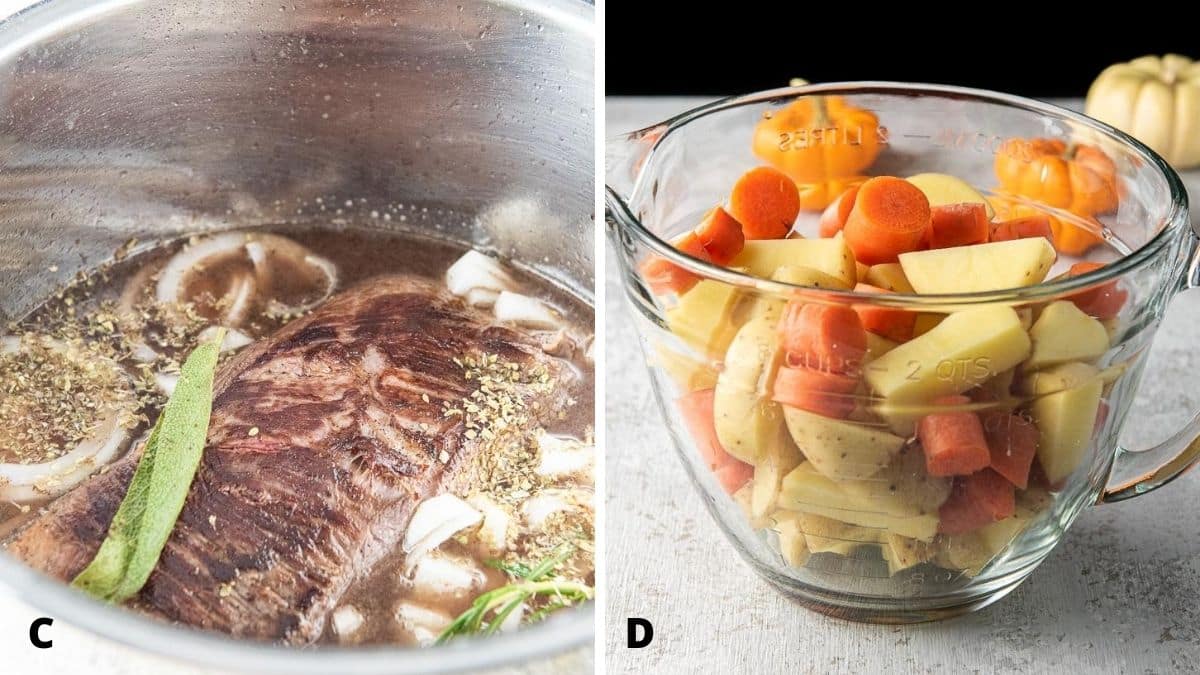
Pour red wine into the insert and use a wooden spoon to scrape (deglaze) the bottom of the pan. Place the roast back in and add the sliced onions, beef broth, dried oregano, sage leaf and rosemary sprig. (C)
Would you like to save this recipe?
Don't worry, I promise not to spam you.
Step five
Seal the IP, making sure the venting knob is set to sealed and press the pressure cook button. Make sure the mode is set to normal and at high pressure. Set the timer for 60 minutes.
Step six
Once the IP beeps that it is done, you are going to do a natural release which will take roughly 30 minutes for the floating valve (or silver button on top) to depress.
Step seven
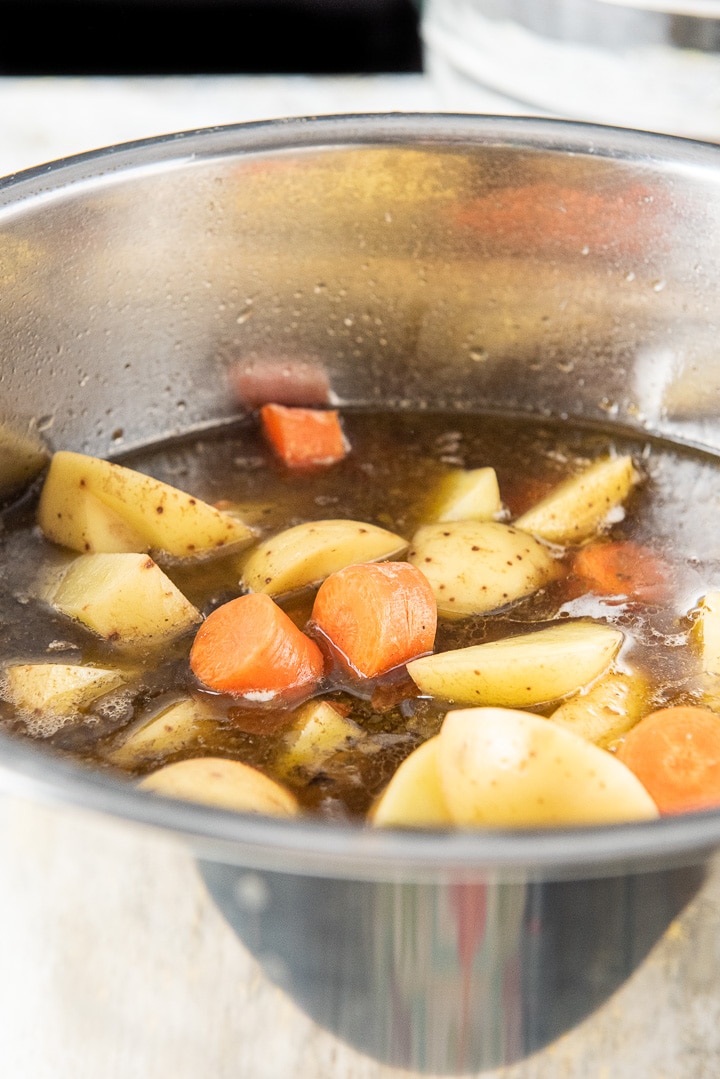
While you are waiting for the 30 minutes for the IP to release the pressure, wash the potatoes and carrots and to cut them into chunks. Slice the celery in half lengthwise and then into slices width-wise. (D)
Step eight
Add the potatoes, carrots and celery.
Step nine
Place the lid back on the IP and seal it. Make sure the venting knob is set to sealed and press the pressure cooker button again. Set the timer for 10 minutes. Note: the IP won’t take as long to come to pressure as it did when it was starting cold.
Once the timer beeps, wait 10 minutes before doing a quick release. (See helpful tips to find out how to do a quick release.)
Take the meat out of the IP and place on a platter. Also remove the vegetables and set aside.
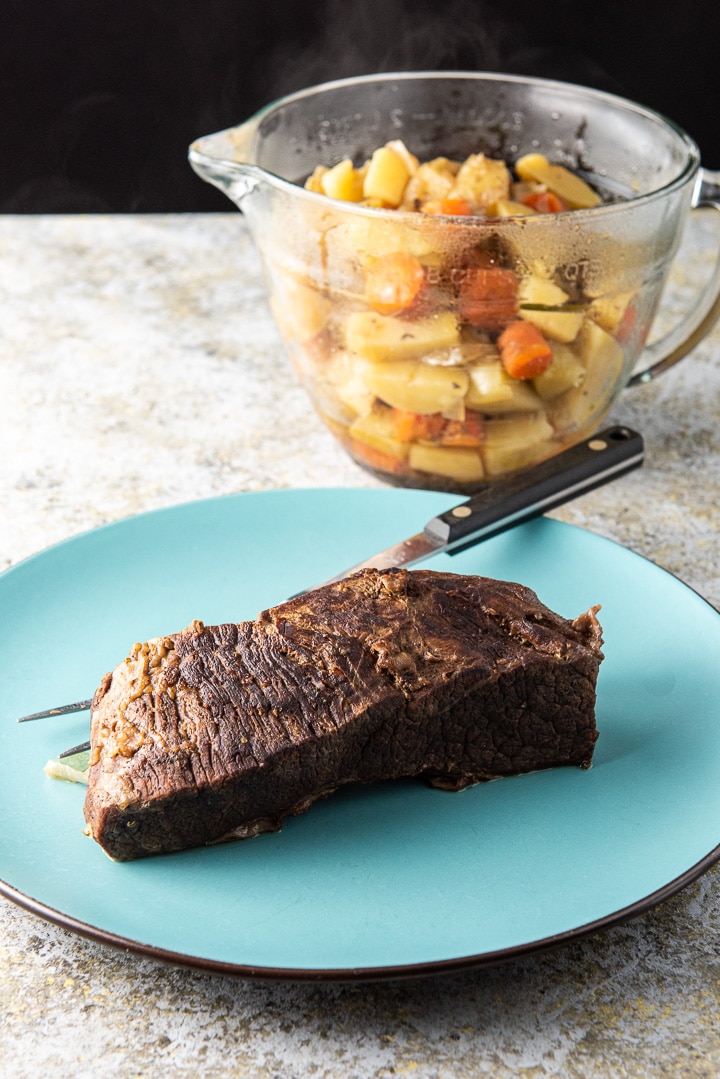
Step ten
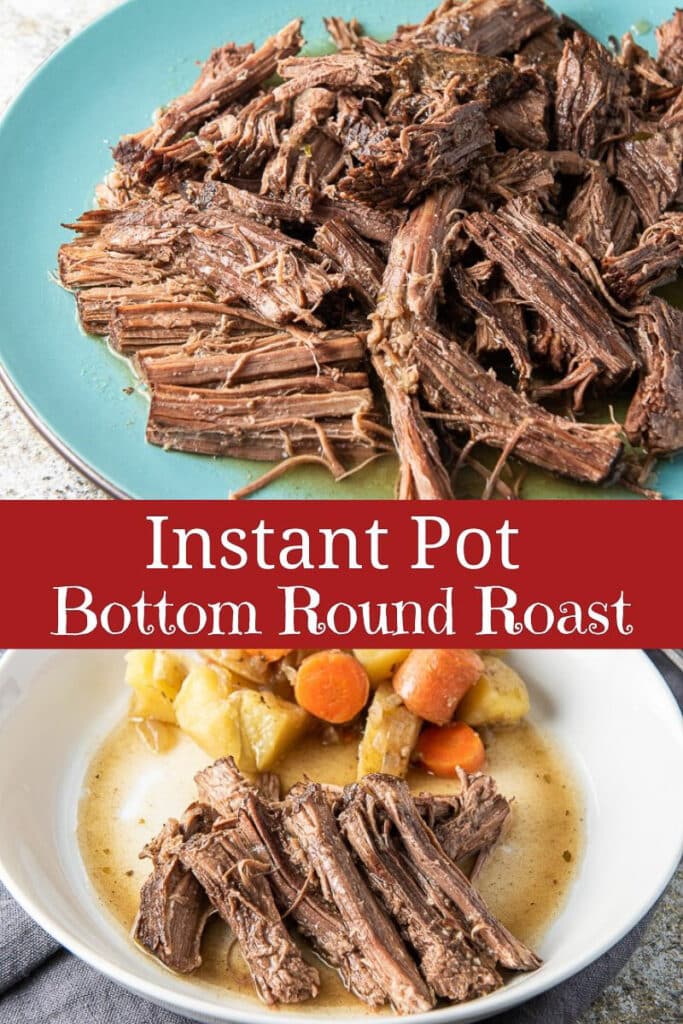
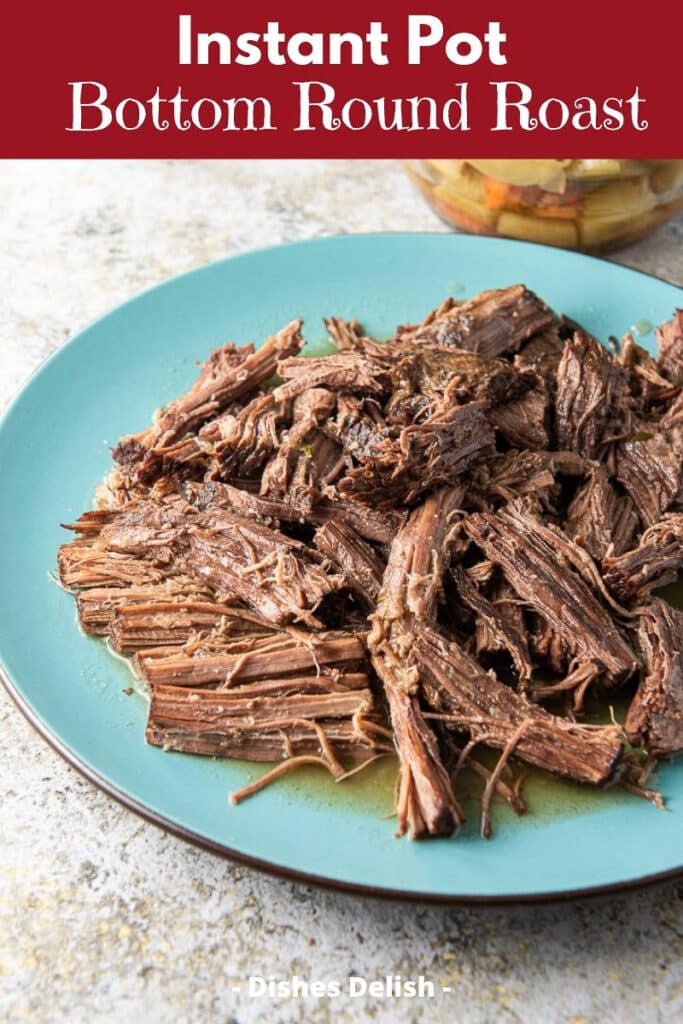
Take two forks and pull the meat apart until it has all been shredded.
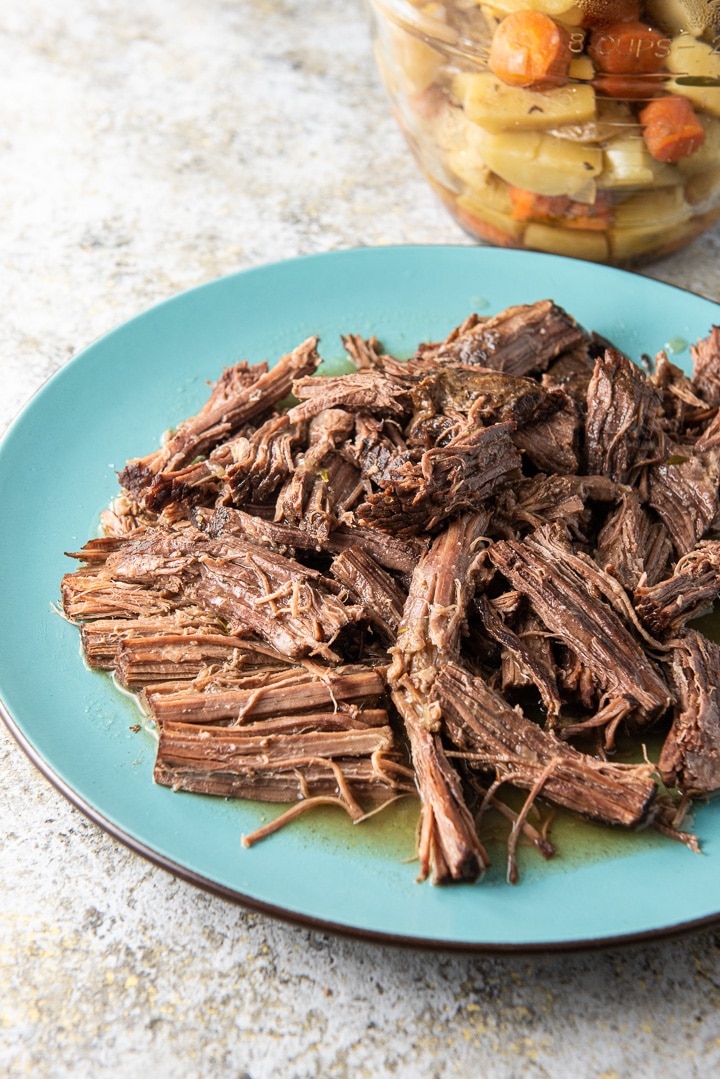
See how delicious this roast looks? Nice and moist!
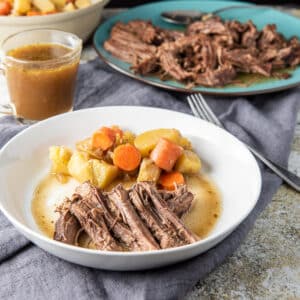
Step eleven
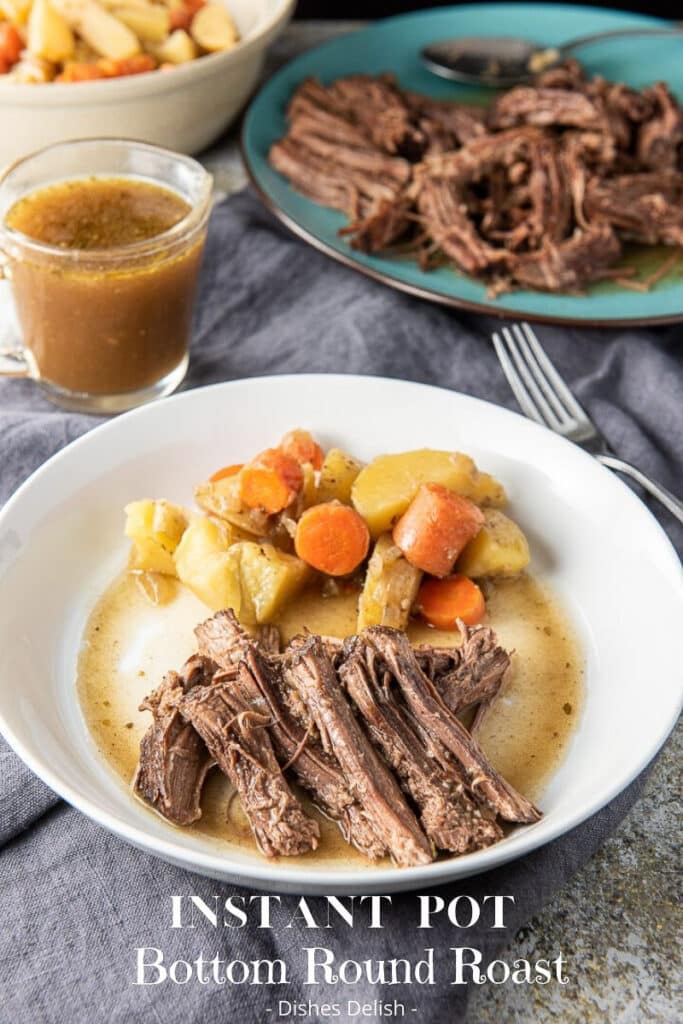
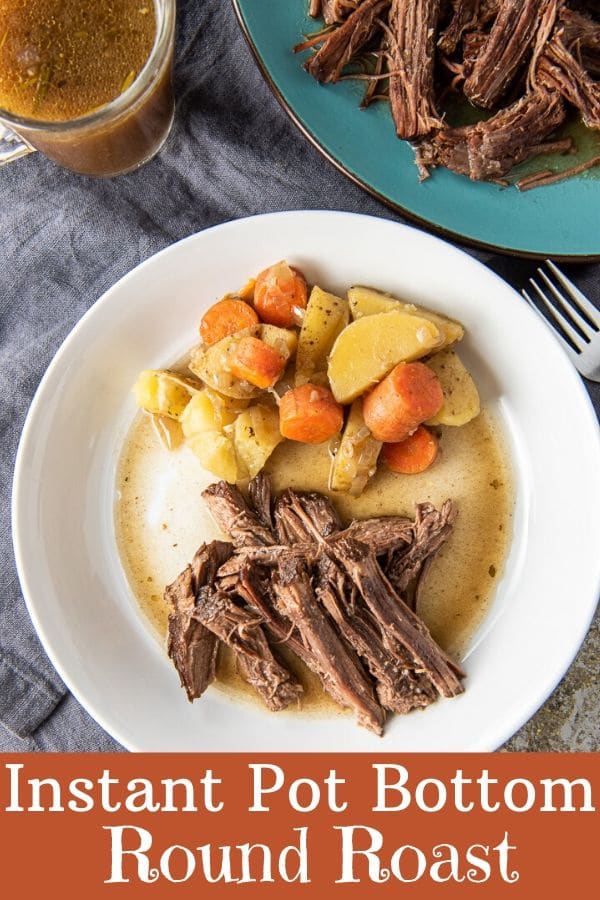
Plate the beef with some vegetables; pour some gravy over the meat and veggies.
So delicious!

I hope you enjoyed this Instant pot bottom round roast recipe.
Have extra roast and don’t know what to do with it? Here’s a great recipe from my friend Beth that is a must try.
Other popular meat recipe
And as always, may all your dishes be delish!
If you’ve tried this recipe, I’d love to know what you thought about it in the comments below. I love hearing from you! You can also FOLLOW ME on FACEBOOK, TWITTER, INSTAGRAM and PINTEREST to see more of my delicious food and delightful cocktails!
Instant Pot Bottom Round Roast
Ingredients
- 2 tablespoons olive oil
- 2.25 pounds bottom round roast (see notes for alternatives)
- 1 tablespoon Kosher salt (this is for seasoning the meat – if you don't have kosher salt, decrease salt to 1.5 teaspoons)
- 1/8 teaspoon ground pepper (use as much as you like)
- .50 cup red wine
- 4 cups beef broth
- 1 medium onion (cut in half and then in slices)
- 1 pound carrots (washed and cut in chunks
- 5 medium potatoes (Yukon gold, washed and cut in chunks)
- 1 stalk celery (washed and cut in half lengthwise and then sliced)
- 1 large sprig roasemary
- 1 large sage leaf
- 1 teaspoon oregano (dried)
Instructions
- Open meat package and pat it dry with a paper towel. Salt and pepper both sides of the roast
- Plug Instant pot in and press the sauté button. Let the IP heat up (the display will display "hot") and add olive oil and once that heats up add the roast fat side down. Sauté for 3 minutes and flip to the other side for another 3 minutes. Remove and set aside
- Add wine and use a wooden spoon to scrape the bottom of the IP insert to deglaze. Make sure to get all the flavor crystals
- Add the meat back into the IP, then add broth, onions, rosemary, sage and oregano
- Seal the IP and make sure the venting knob is in the sealed position. Press pressure cooker button and set the time for 60 minutes. Make sure the mode is normal and the pressure is high
- Once the IP beeps, let it release the pressure naturally (this can take up to 30 minutes). The float valve or silver button will drop on the lid
- Add carrots, potatoes and celery. Seal IP and make sure the venting knob is sealed the mode is normal and the pressure is high. Press pressure cook button and set timer for 10 minutes – the IP won't take as long to come to pressure this time
- Wait 10 minutes before doing a quick release (see notes at how to do this)
- Remove meat to a platter and take the vegetables out of the broth. Let the meat rest for 10 minutes before shredding or cutting into it
- Take two forks and shred the meat however large or small you want it
- Plate some meat and veggies and ladle on some gravy
- Eat
- Smile
- Enjoy
Equipment

Would you like to save this recipe?
Don't worry, I promise not to spam you.
Notes
- According to this awesome guide from the people who made the Instant pot, allow 20 – 25 minutes of cooking time for your roast per pound. (This is for a roast that hasn’t been cut into chunks).
- The Instant pot takes a good 15 – 20 minutes to come to pressure. I do not include that time in the recipe timing but know that the meal will usually take 30 minutes longer than stated. The reason I don’t add the time is because each recipe is different and it depends on how full the IP is.
- After the meat has cooked for 60 minutes, you are going to let the IP release the pressure naturally. You won’t have to don the oven mitt but make sure the silver pressure button has dropped down to its resting position before you remove the lid.
- After the vegetables have been cooked, after 10 minutes, you can do a quick release on the IP. Make sure you stay safe by putting on an oven mitt before moving the venting knob from the sealed to venting position. Keep your hands and face away from the steam as it will scald you.
- If your cut of beef is especially fatty, make sure to cut off as much fat as you can so you don’t finish with overly fatty gravy.
- I don’t make a traditional ‘gravy’ with a flour slurry – so I call the juice and broth that is cooked with the meat ‘gravy’. I prefer that over making a flour based gravy.
- The meat and gravy freeze well. Just make sure to store them in airtight containers and mark the date when they go into the freezer.
- Got a frozen roast? You can add 20 – 30 minutes to the initial cooking time.


This roast was delicious and easy to make! I will make it again. 🙂
Thank you so much Genevieve!
I tried this and my roast was almost 4 pounds. I probably won’t cook it as long. A little dry☹️
I’m so sad to hear this, Linda. I don’t know what’s going on as it always comes out perfect for me and other people who’ve tried it and then some people have dry meat. I’m so sorry this didn’t work for you.
Tried this recipe with 3 lb bottomround roast. Unfortunately, it came out tuff and dry. I Follwoed the recipe exactly as outlined. Sorry.
I’m so sorry to hear that David. I hate to hear when my recipe fails. Especially when it works for some people. I’m wondering if it is an altitude thing or something that affects the timing. But I’m sorry it ruined your meal. 🙁
The recipe called for 2.25 lb roast. But your roast was 4 lbs? Beef has to be cooked long enough to get past the dry stage and melt the fat in the meat which is what makes it moist. I’m guessing your roast wasn’t cooked long enough to accomplish this.
I am wondering if anyone didn’t know how to make sure the pressure was high pressure instead of low pressure? I had to look it up. Hold the pressure cook button down until it switches from low to high, set the 60 minute timer.
Thanks for clarifying that Dana! I appreciate it. Mine is always on High so I always assume everyone else’s are too.
Hi,
I made this recipe as directed. I did not have fresh herbs so I just used dry. The flavor was the best I’ve ever had, the vegetables were cooked perfectly. My problem was the roast, while not dry, it was tough and chewy.
I’ve tried multiple recipes for Pot Roast via oven, crock pot then tonight the IP.
The cut of meat and weight of the meat was per your recipe. What am I doing wrong!!!
Thanks for your input,
Sherri
Hi Sherri. I’m sorry to hear that it was tough and chewy. I feel bad when my recipe doesn’t work for someone. Thank you for telling me your experience. It is very much appreciated.
I’ve discussed with an Instant pot expert why this happens for some people but not for others. They said that the IP takes longer to come to pressure than other pressure cookers and especially if the sealing ring needs to be replaced (depending how often you use it). I replace mine every 6 months.
If the sealing ring needs changing, it can in fact increase the cooking time and result again in a roast that goes dry because it has cooked for too long.
Also if it is a better cut of meat and doesn’t have a lot of fat, it doesn’t need as long to cook.
Chuck seems to take longer than a bottom round roast.
I wish I had a better explanation. I hope this helped.
I’ve always heard that meat needs a full natural release to avoid being tough. So I’m curious about the quick release after the veggies. Is that what’s making some come out tough?
Would it be better to reduce the time and allow for a natural release instead?
I’ve done it both ways. Quick release and natural release and I don’t notice a difference. I wouldn’t change the timing, but if you’re more comfortable with the natural release, then do it that way. I hope you enjoy it when you try it, Red.
After Ithe roast and veggies are done, I whisk in 1 or 2 pkts of brown gravy mix, and whisk it until it thickens, 1 at a time! Lretty good!! Thanks for the recipe!! 😁❣️
I’m so glad you enjoyed it, Debra. That’s a great idea for everyone who loves a thicker gravy for sure!! Thanks for sharing and taking the time to write the comment! Much appreciated.
Did the exact same recipe with butcherbox same cut. Turned out dry:(
Maybe I should have cut the cooking time in half
I am very sorry to hear that, John. I seriously don’t know why it comes out great for some people and dry for others. I feel bad when the recipe doesn’t work. 🙁
Maybe the size of the instant pot??
I read up on it John after I saw your comment. According to the instant pot website, they say the time would be the same whether it is a three quart or an eight quart. Mine is 6 quart.
I had 2 roasts equaling a bit over 5lbs. I increased the first cook time to 75 min and it was falling apart delicious at the end. So juicy. I’m guessing anyone who had dry roast must have under cooked theirs
. It did take a very long time to come up to pressure but that was because the pot was so full I think.
Thanks so much for your comment, Patty! I appreciate it, and I’m glad you enjoyed it.
Love how easy and delicious this recipe is. It’s perfect for family dinner.
Thanks Shadi!
Love this classic roast in the instant pot! So easy!
Thanks so much Michelle! 🙂
One can never go wrong serving a classic dish like this for a gathering, since this is so delicious and easy. I can’t wait to make it again and that’s saying something since I still have leftovers in the fridge. 🙂
My thoughts exactly Anita! Thank you. It is perfect for leftover wine for sure!
This was so delicious! Moist and tender! I always look forward to my Butcher Box order! It is scheduled to arrive tomorrow and I can’t wait to make this again.
Yay! Thanks, Beth.
Now that I found this recipe and made it, my Instant pot is going to be getting a lot of use this winter with comfort food recipes like this! The IP makes the meat so tender.
I totally agree with you Sharon! Thanks.
Wow, you have the easiest version I would say. I love the idea of dump and push dinners. Thanks a lot for this recipe. It was easy and delicious.
Thanks Sophie! I love my IP and also love how the meat comes out in this recipe.
My husband made this last week and it was wonderful! Exactly what we needed on a cold, fall evening. It was tender, flavorful and went wonderfully with all the roasted veggies we made!
I’m so pleased you enjoyed it! You made my day, Leslie!
Ohhh this is my love language, right here! We made it a few days ago and loved it. It’s the perfect winter meal and will definitely be on our menu again for next weekend – I’ll be snowing 3 days in a row – will be perfect for a dinner after snowboarding!! Thanks!
Thanks Aline. Yikes, snow 3 days in a row? But fun time of year to snowboard or in my case to watch others snowboard. 😉 I’m glad you liked it enough to make it again.
This roast was super tender, and moist. I love that it’s complete meal with the veggies on the side and the gravy. Thanks for the step by step, really helpful, together with the suggestions and substitutions.
Thanks Loreto! I appreciate it. I love this meat!
Can you slice instead of shred the meat. I am getting to cook the meal
Yes. I hope I caught you in time. You can slice it. I just chose to shred as I prefer it that way.
The recipe itself is great, but it needs to cook (at least in my case) much longer. Using it he way that was written, I could barely cut the meat, never mind pull it apart. I ended up going for at least another hour before the meat was tender.
Good to know Bill. If you don’t mind me asking, how big was your roast? I may have to adjust the notes to specify larger cooks longer. Since it’s just hubby and I, I always go for the smaller cuts of meat. Thanks for your comment.
One of my favorite Instant Pot recipes! It was very easy to put together and my family LOVED it! I did add some corn and cabbage for a bit more flavor and I recommend if you want to try it:)
Thank you Elaine for sharing!
I’m so glad to hear that, Jazlyn! We love it here too. And I shall add those veggies as we love them too.
GREAT recipe! I had to make a couple modifications because my roast was a bit larger and I didn’t add the amount of broth called for.
The meat was tender and delicious. Cooking the carrot and potatoes later in the process was perfect.
I skimmed the fat from the liquid and made a gravy with a flour slurry.
Thank you! Will make this again.
I’m so happy to hear that Lisa! Love the flour slurry! I’m glad it came out tender and delicious! You made my day!
Hello! Thank you for this post…it looks amazing! I’m looking to just cook the roast itself in the instant Pot. I have a 2.30 lb top round roast. What would be the cook time and pressure release for just the meat be? Thank you for your help!
Hi Heather. Sorry didn’t see this until Monday morning. 55 minutes on normal mode and high pressure should do. Make sure to add some broth (I’d say 2 cups) and (wine – this you can skip if you like) since it will flavor it greatly and prevent sticking. I would wait ten minutes before doing a quick release. Let me know if you have any other question.
I would give 5 stars because the flavor is amazing and the recipe isn’t that complicated. With that said – you should include the IP settings more specifically. High/low pressure wasn’t specified, so I left the setting alone. My meat wasn’t cooked after the initial time. I put it back in and it was a tough overcooked honk of meat.
So sorry to hear that Stephanie. There is nothing worse than overcooked meat. I just fixed the recipe card to reflect that it should be in normal mode and high pressure. I did have it in the body of the post but neglected to put it in the recipe card. I hope it didn’t ruin your meal. 🙁 Thank you for the comment to let me know.
I’m going to do this recipe in a couple of days. I find that since we live in a little higher altitude in Arizona I need to put it on more rather than normal. Would this be OK?
Thx
I would say yes, Debbie. I live in the Boston area so normal is good for me. But if you have found you need to set the mode to something else, do it for sure. I hope you enjoy the recipe!
Made this tonight and followed the recipe, even had the same cut of meat from butcher box and it turned out perfectly. Only change I made was making the potatoes separately into mashed potatoes. But otherwise this recipe turned out GREAT! My boyfriend said 10/10 😊
That is high praise, indeed! Thank you so much for letting me know Lauren! You just made my day. I love mashed taters but hubby doesn’t. Maybe next time I make it I’ll do some on the side for me! 🙂
Used center cut Bottom Round Roast. Followed time. Meat was done but did not fall apart or could be separated with forks. The potatoes were too soft.
Aww. Sorry to hear that Bob. Was your roast a lot bigger? Just curious how many pounds to see if I should put a note stating different cooking times. Thank you for your feedback.
I want to try this recipe! I have a 3.3 lb roast, what should I do in terms of time? Thank you!
I would say add 5 more minutes on the original cooking time before you add the vegetables. If you’re not going to add the veggies total time should be 60 minutes. I hope you enjoy it Jennifer!
Thank you! I will let you know how it turns out.
I do not understand. I followed this recipe to the T! It was tough and dry?!!… I was determined to get this right !! I am a great cook. But this is 2nd recipe since I got my INSTANT pot! That was terrible. I don’t understand what went wrong here?!..,I went back over & over this recipe w/my husband. We are both really disappointed !?if you can help plz do…we are not having abt success with this cooker. I’m ready to toss it!!! Thx
I’m so sorry to hear that Jaime. I just sent you an email with my thoughts. The majority of people love this recipe and only a minority had issues. I think that is true with all recipes as there are so many factors to consider. Thank you for letting me know and look for my email.
I had that luck the first time I used mine, with a recipe similar to this. I did a lot of reading and looking at recipes, and decided to pick the one which resembled an old one a family member used which was the best id had. Searing the roast first on the meat function after seasoning with Lawry garlic salt, salt and pepper. Add a 32 oz carton each of beef and chicken broth. Slow cook on high temp 4 to 6 hrs, or 7 hrs for low temp. Then pressure cook for 45 minutes, following all proper instructions for safety. Alter recipe to your liking, adding less broth with more vegetables, or different seasoning. I take a cup of the juice after slow cooking out to make a thick flour or starch gravy, microwaving gently to precook the flour, and then mix in with the entire solution before pressure cooking. Then I serve with homemade mashed handwhipped potatoes, salad, green beans, sometimes macaroni and cheese. I’ve noticed the long cooking makes a great difference in the quality, moistness, and melting in your mouth fall apart goodness I remember growing up with. Hope this reaches you in time. I may have increased the overall times to my liking, and I believe even a 4 hour slow cool before pressuring makes a huge difference.
That’s awesome to know John. That’s for taking the time to write that all out. I’m going to try it your way to see how it is.
The beef was moist and tender. The meat and vegetables had great flavor from the herbs and spices. My husband loved it!
I’m so happy to hear that Debbie! We love roast here at my house and I love how easy the IP makes it. And since I’ve been using it, it’s been making my life easier! 🙂 Thank you for letting me know.
The flavor was good, but it was horribly overcooked. I followed the instructions exactly, even had the same cut and size of beef. The veggies were cooked perfectly and overall the flavor was good. Should the pressure actually be set to low for the 45 minutes?
Awww. I’m sorry it didn’t come out for you, Autumn. I get sad to think of something not coming out as intended and I can just imagine the disappointment. I’ve always cooked this roast on high pressure for that time. I wonder what happened with yours.
Do I need to defrost the roast before putting in the pressure cooker?
Yes, I defrost my roast before I start cooking it Mitchell! Let me know how it comes out.
Made this just now, 3.25 lb roast cooked for 1 hour and 5 minutes allowed to slow release. I had everything but the sage and I am not crazy about the flavor.I think it may have been too much rosemary on top as I grow it fresh. But the roast was also dense. There was no shredding it, it had to be sliced up. I am letting it slowly soak up some of the juices as it is quite dry as is.
I’m so sorry to hear that Lesley. Not sure why that happens for some people and not others. It always comes out perfect for me. I hope it soaks up the juice for you. Thank you for letting me know.
Yes it was awfully dry but I think it’s more about where you get your meat from. Some are quality and some aren’t. Also the instant pot makes food a little dehydrated sometimes. 😕
Thank you for your time and effort the flavor was “SMACKIN” as my son says.
I’m so sorry to hear that Megan. I think what I need to do is get a bunch of different roasts at different stores and try it out at different cooking times. I do use a good cut from ButcherBox and maybe it has more marbling than other ‘brands’. I’m glad your son thought the flavor was smackin, but I’m sorry the meat was dry. That really stinks. Thank you for letting me know.
At the end of the recipe, gravy magically appears. There’s no mention of preparing it from the broth, and a bottle/can of gravy isn’t listed in the ingredients. Please advise.
Hi Tadas. Sorry for the confusion. I modified the recipe card. I am calling the juice and broth that I cooked the roast in “gravy” but it isn’t a traditional gravy with a flour slurry. Again, sorry for the confusion. I think the liquid that I cook the roast in is tasty as is, but feel free to make a traditional gravy with it.
I’m assuming once the vegetables go in and you pressure cook for another ten minutes you continue to do so on high pressure? Explicit details like that would be helpful for us instapot newbies.
Sorry, Joel. Yes, on high pressure. I’ll fix it on the recipe card. Thanks for pointing it out.
I read the other comments about toughness. I cooked 3.5 lb. (prior to trimming) for 35 minutes. I let it draw down naturally. When I put the temp rob in, I knew it was tough. I put the carrots in and cooked for + 10. Then another round of natural cool down. Very much better. Very, very good. Wil do again. P.S. made minor adjustments of my own, no worroes.
I’m glad to hear that Brutus and thank you for telling me. I’m glad you enjoyed it with your adjustments.
I’m an InstantPot newbie. The roast is in the pot! My roast is 3.6 lbs so I’m doing 90 minutes and unlike a lot of people online, I’m adding my potatoes and most of the carrots, celery and onions after and doing 10 extra minutes with the roast still in there like Elaine is saying. My mouth is watering. I did get a C8 error on my InstantPot during sautéing but people online say that happens. I continued on by unplugging and then started sautéing again. There was more liquid in the pot in the picture. My liquid when I added veggies was 1 ½ inched below the meat. We started with four cups of liquid, 1 c wine and 3 cups mushroom broth. Hope that is ok. Meat temp when I added veggies was 197 degrees F. After veggies cooked the meat temp is 210. We cut the roast in slices but that was a mistake. The meat alone was very dry and needs to be pulled and then have the gravy poured over it. We also didn’t add flour like Elaine. It was just delicious!! We had some horseradish sauce too which added a nice flavor too. The veggies and potatoes were cooked perfectly!
Thanks so much for the feedback Mary. I’m going to amend the notes to say that it is a pull apart roast instead of a sliceable one. I’m so glad you enjoyed it! 🙂
Made this last night for dinner. My house smelled heavenly! This reminded me of our Sunday family dinners where everyone showed up at our door. This was delicious, tender, and juicy. We also had leftovers and roast sandwiches tonight. Thanks for the great receipe
I’m so happy to hear that Su! I’m so glad it invoked great memories and that you enjoyed it! Thank you for taking the time to tell me. I appreciate it.
Hey new to the IP industry, I made this and it has an amazing flavor though meat is dry. I cooked 50 min high normal as my meat was 1.9 pounds. The allowing pressure naturally only took 12 min. I did press the vent and have the 6 qt IP. Do you think I should Cooke less time? Please help I want to try this with out meat dry.
Carol, I’m sorry to hear that your meat was dry. What cut of meat was your roast? Was the meat lean or did it have some fat on it? I have found 25 minutes per pound works. I go to 30 because I find the meat I use needs a little more time. So my roast was 2.25 pounds and took 70 minutes. I’m thinking depending on your cut, it should have cooked for 60 minutes.
First time making a roast in the Instant Pot. I had a Beef Bottom Round Roast that I defrosted and need to cook and this recipe was perfect. Few mods … I used a cup of red wine, added 10 cloves of garlic, skipped the Rosemary, and only added onions as I was making roasting Brussels Sprouts as a side. With the 25 minutes per point rule I cooked the roast for 2 1/2 hours and it couldn’t have come out any better! Super moist and delicious!!!
I’m so happy to hear that Barry! I like your modifications and it’s fun for me to see what others do. Thank you for letting me know what you thought and that you liked it. 🙂
Great instructions, however, I do not have red wine on hand and wonder what else I could use? Think I’ll try my ole standby onion soup mix and branch.
Susan, the wine isn’t really necessary, it just adds a nice flavor, so you can omit it. And that addition is great. I hope you enjoy the recipe.
I had the Butcher Box 2.5 lb beef bottom round roast and it cooked perfectly! Thanks for the recipe!
I’m so glad to hear that Paige. We love this recipe in our house. And yay on the ButcherBox beef. Thanks so much for letting me know.
It was absolutely delicious
It was different as I was used to make it
I added mushrooms and made the gravy with the broth, other than that I follow all of the steps and the results were fantastic
I’m so glad to hear that Adriana! Ooo, mushrooms. I need to do that the next time I make it. Thanks so much for letting me know 🙂
Wonderful recipe. The meat fell apart on my fork and the vegetables were cooked perfectly. A great meal for relatively little work.
I’m so glad to hear that Steve! It’s definitely a favorite in my house. Thank you for letting me know.
Hi,
Just got done making this, came out great. The only things I did differently were to add ten minutes to the cook time since my roast was just shy of 3 lbs, and then let the final cook (with the vegetables) sit for 20 minutes rather than 10 before doing the quick release. Oh yeah, I added more celery, only because I like celery.
Anyway, great recipe. Thank you.
Yay! I’m happy to hear that Bob! I’m so glad you enjoyed it and I love that you changed it to suit your likes! Thank you for coming back to the site and letting me know. I appreciate it.
Just made this recipe with the butcher box bottom round roast and it turned out amazing! As per some of the other comments I went on the safe side and did 50 minutes in the instant pot with 30 mins natural pressure release. Seriously, turned out perfectly moist. Highly recommend!
I’m so glad to hear that Katelyn. Thanks for letting me know and coming back to comment.
This made the best French Dip sandwiches ever!!!
I’m so glad to hear that Cathy! We make those sandwiches too with leftovers! Thanks for letting me know.
This recipe is so good. Thanks for the recipe.
You’re welcome, Ashe! We enjoy eating this at least once a month! Thanks for your comment.
So Delicious! I substituted rutabaga for the potatoes (husband pre-diabetic). Absolutely recommend!
You made my day, Jennifer. Thank you for letting me know and commenting!
The flavor was great, the veggies were perfect but unfortunately the meat was dry and tough. I used a 1.65 lb roast and cooked it for 41 minutes as calculated 25 min/lb.
I think if I took the meat out before cooking the veggies, it may have worked.
Aww. I’m sorry to hear that, Julie. I always feel bad when a recipe doesn’t work for someone. Thank you for your comment.
Unfortunately this recipe turned out very tough and dry.
3.1 pound grass fed bottom round roast. I upped the broth a cup since my roast was bigger; but i should have cut it into chunks the moment I realized the broth only covered half the roast in my 8 quart Instant Pot. i followed the recipe except for allowing mine to naturally release since mine would take hours, but I swt pressure cook for 60 minutes and let release for 30 before manually releasing the rest. I think the worst part is that the veggies were so overcooked and pure mush that neither kid would touch it.
I’m very sorry to hear this, Erin. I’m not sure why it works for most people but not for some. I always feel bad when it doesn’t work.
This looks like a delicious recipe. I think I’ll give it a go soon. Can we add butter to the recipe, either when we put the roast in or when we put the vegetables in. I just don’t want the butter to burn in the Instant Pot.
It won’t burn, Liam as there is liquid in there as it cooks. I hope you enjoy the recipe.
I made this recipe tonight, with a moose bottom round roast. It was a little smaller than your suggested size and I (kind of) overdid it on the liquid in the Instant Pot, but it came out fine. The leftovers are in a bowl on my counter, cooling off right now.
It will make for a most excellent dinner tomorrow night.
Thank you!
I’m so glad to hear that, Liam. And yum on the moose. I bet it tasted heavenly. I love all game meat. Thanks so much for letting me know you liked the recipe.
This came out perfect! 2 1/2 lb rump roast. Falling apart tender, great flavor. Thanks!
I’m so happy to hear that, Rebecca!! We love it and now I want to make it again!! Thanks for coming back to the site and letting me know.
Overall this is a five star! It was tender and delicious. I used dry herbs, and didn’t have Sage so substituted Thyme. It was delicious! My only feedback is regarding how much time it takes start to finish. With heating and depressurizing it was around 2 1/2 hours for me start to finish (15-20 minutes prep and sauté, 2 sessions of active cooking totaling 70 minutes, 2 sessions of heating before cooking totaling 20 minutes, 2 sessions of depressurizing wait time totaling 40 minutes, 10 minutes to let the meat rest). With that said- it was SO WORTH IT! whole family loved it!
Thanks for the feedback, Saran. I appreciate it. I think I’ll add the depressurizing in the timing on the recipe card. The reason I didn’t is because, it depends on the pressure cooker, the seal, etc. But great feedback and I’m happy you enjoyed it.
Elaine ~ I have been making roasts in my Instant Pot for 11+ years now, and this is the BEST recipe I’ve ever made! I substituted scallions for the onion (so my dog can have some), and since I didn’t have any sage, I substituted summer savory. I also threw in 3 garlic cloves and 2 bay leaves (habit – I’m Italian). It is SO delicious, I can’t thank you enough! I usually make gravy with the broth by adding butter and heavy cream, but the natural juices with the wine were so delicious, that I didn’t bother making gravy. Overall, it was a total success.
I’ll be making this recipe again and again! ~ Debra
Thank you so much, Debra! You made my day – really! I love this recipe too and am happy when others do as well. It works for most people but some have a hard time with it. It makes me happy that you liked it and that you took the time to let me know.