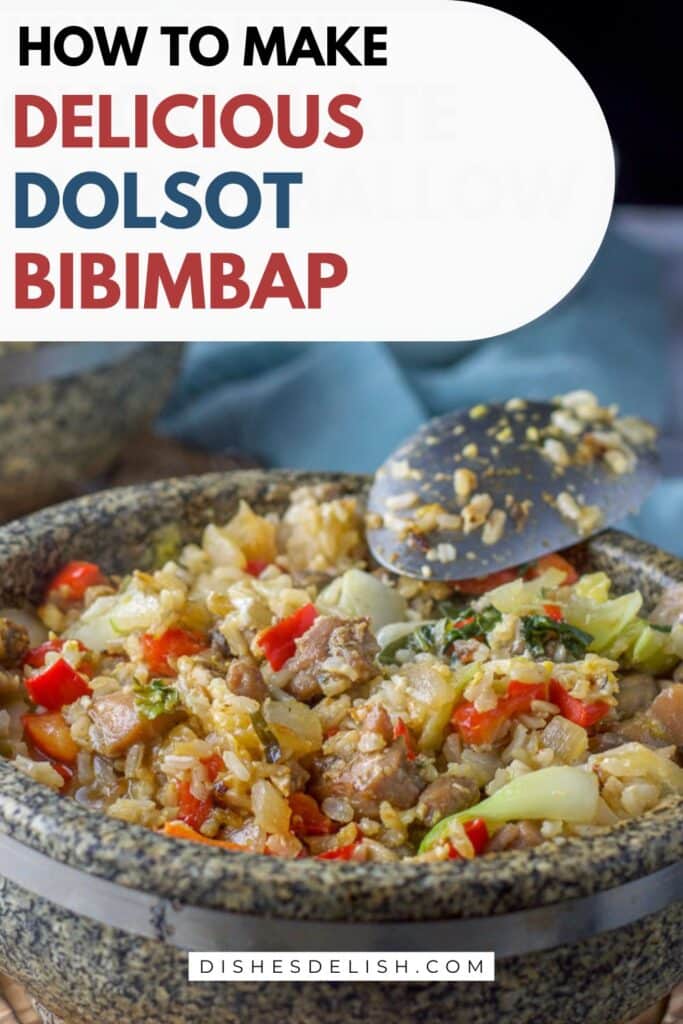
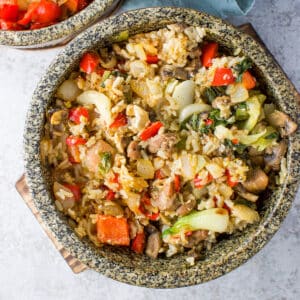
Dolsot Bibimbap | Stone Bowl Bibimbap
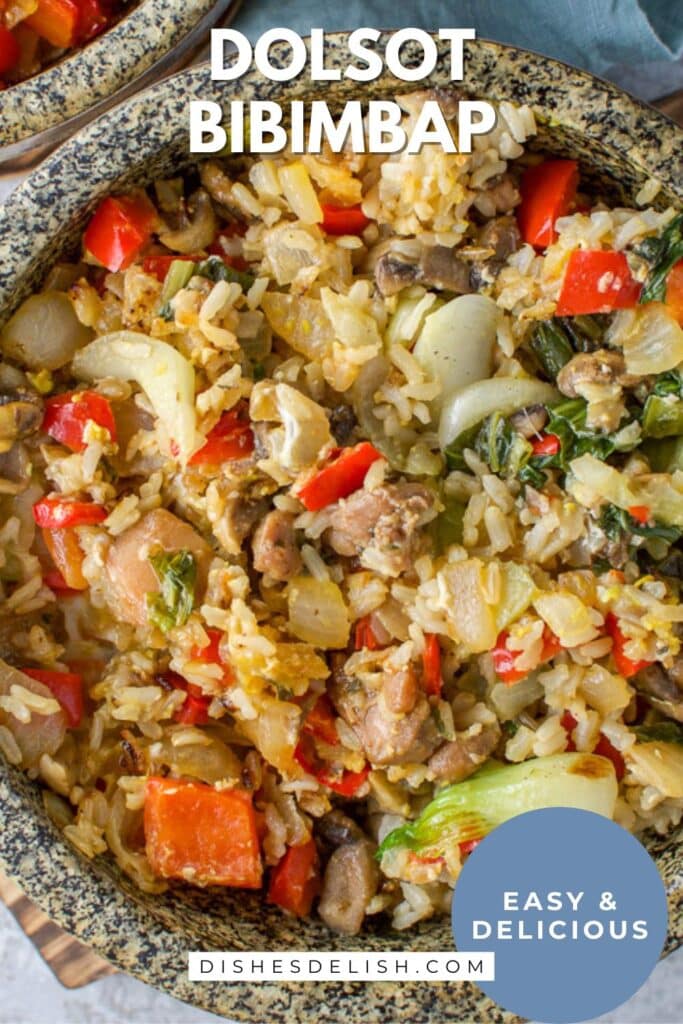
This dolsot bibimbap recipe offers a delicious spin on the classic Korean rice dish served in a sizzling stone bowl. Topped with tender chicken thighs, fluffy rice, eggs, and an array of vibrant vegetables, this hearty meal is as comforting as it is satisfying.
I talk about my first experience with dolsot bibimbap in this post. Suffice to say that I love bibimbap (aka BBB) so much that I bought the two bowls you see above so I could make this delicious dish over and over!
The heated Korean stone bowl helps the rice become crispy and heats up everything in it, making for a crackling good meal. It’s magical when you mix the meat, vegetables, rice, and egg together, and so delicious when you pour on a spicy Gochujang sauce. If you can’t take the spice, eat your BBB plain or with a few shakes of soy sauce.
We are a participant in Amazon Services LLC Associates Program, an affiliate advertising program designed to provide a means for us to earn fees by linking to Amazon.com and other affiliated sites. #CommisionsEarned. You can read my disclosure here.
The history of bibimbap
Bibimbap means “mixed rice” in Korean. It is over a century old and is derived from another dish called Goldongban, which was eaten on the night before the lunar new year. It was a time for people to clear out the leftovers from their pantries and in later years out of their refrigerator. Just mix the veggies and meat with rice and you get a great meal.
That makes every dolsot bibimbap unique and different because everyone has different items in their fridge and pantry.
Is this recipe authentic?
No. Since I’m not Korean, I don’t use some of the beloved staples they do, such as kimchi, radish salad, or Korean bean sprouts, to name a few.
When I first started to make BBB, I tried to get it as authentic as I could. I bought the bowls, I’d julienne the vegetables and cook them separately to keep the colors segregated.
I no longer do that. I do not julienne the vegetables because it’s too much work and really not necessary. Julienne veggies are pretty, but as soon as you serve this dish, you’re going to mix the whole thing together, which makes the segregation of vegetables a moot point.
I make the recipe as easy as I can because we eat dolsot bibimbap almost every week and I don’t want to dread making it (or stop making it) because of all the work. That’s just me.
Is the dolsot (stone bowl) necessary?
No. In that case, the dish won’t be called dolsot; it will just be BBB. So you don’t need to buy one but let me tell you, once you make this recipe in a hot stone bowl, you’ll never want to make it outside of one. The heated stone bowl makes the rice nice and crunchy and it keeps the BBB hot for a long time.
Is it safe to crack an egg directly on top of the rice?
Yes, if you’re using a hot stone bowl to make dolsot bibimbap. The intense heat from the bowl is enough to cook the egg as it mixes with the other ingredients.
No, if you’re not using a stone bowl. Without that extra heat, the rice and vegetables alone won’t be hot enough to fully cook the egg.
As you stir the egg into the mixture, the contact with the sizzling stone bowl and the surrounding hot ingredients will gently cook the egg, giving the dish its signature creamy texture and rich flavor.
Can I make this vegetarian or vegan?
Yes. For vegetarian BBB, omit the marinated chicken and replace it with tofu or seitan. For vegan BBB, omit both the meat and egg.
We are a participant in Amazon Services LLC Associates Program, an affiliate advertising program designed to provide a means for us to earn fees by linking to Amazon.com and other affiliated sites. #CommisionsEarned. You can read my disclosure here.
Other ingredients you can add
- Beef
- Shrimp or some other seafood
- Carrots
- Zucchini
- Spinach
- Shiitake mushrooms
- Tofu
- Chopped green onions
- Short grain rice
How to make dolsot bibimbap
Pre-step
Cut boneless and skinless chicken in medium chunks and place them in a glass mixing bowl.
Step one
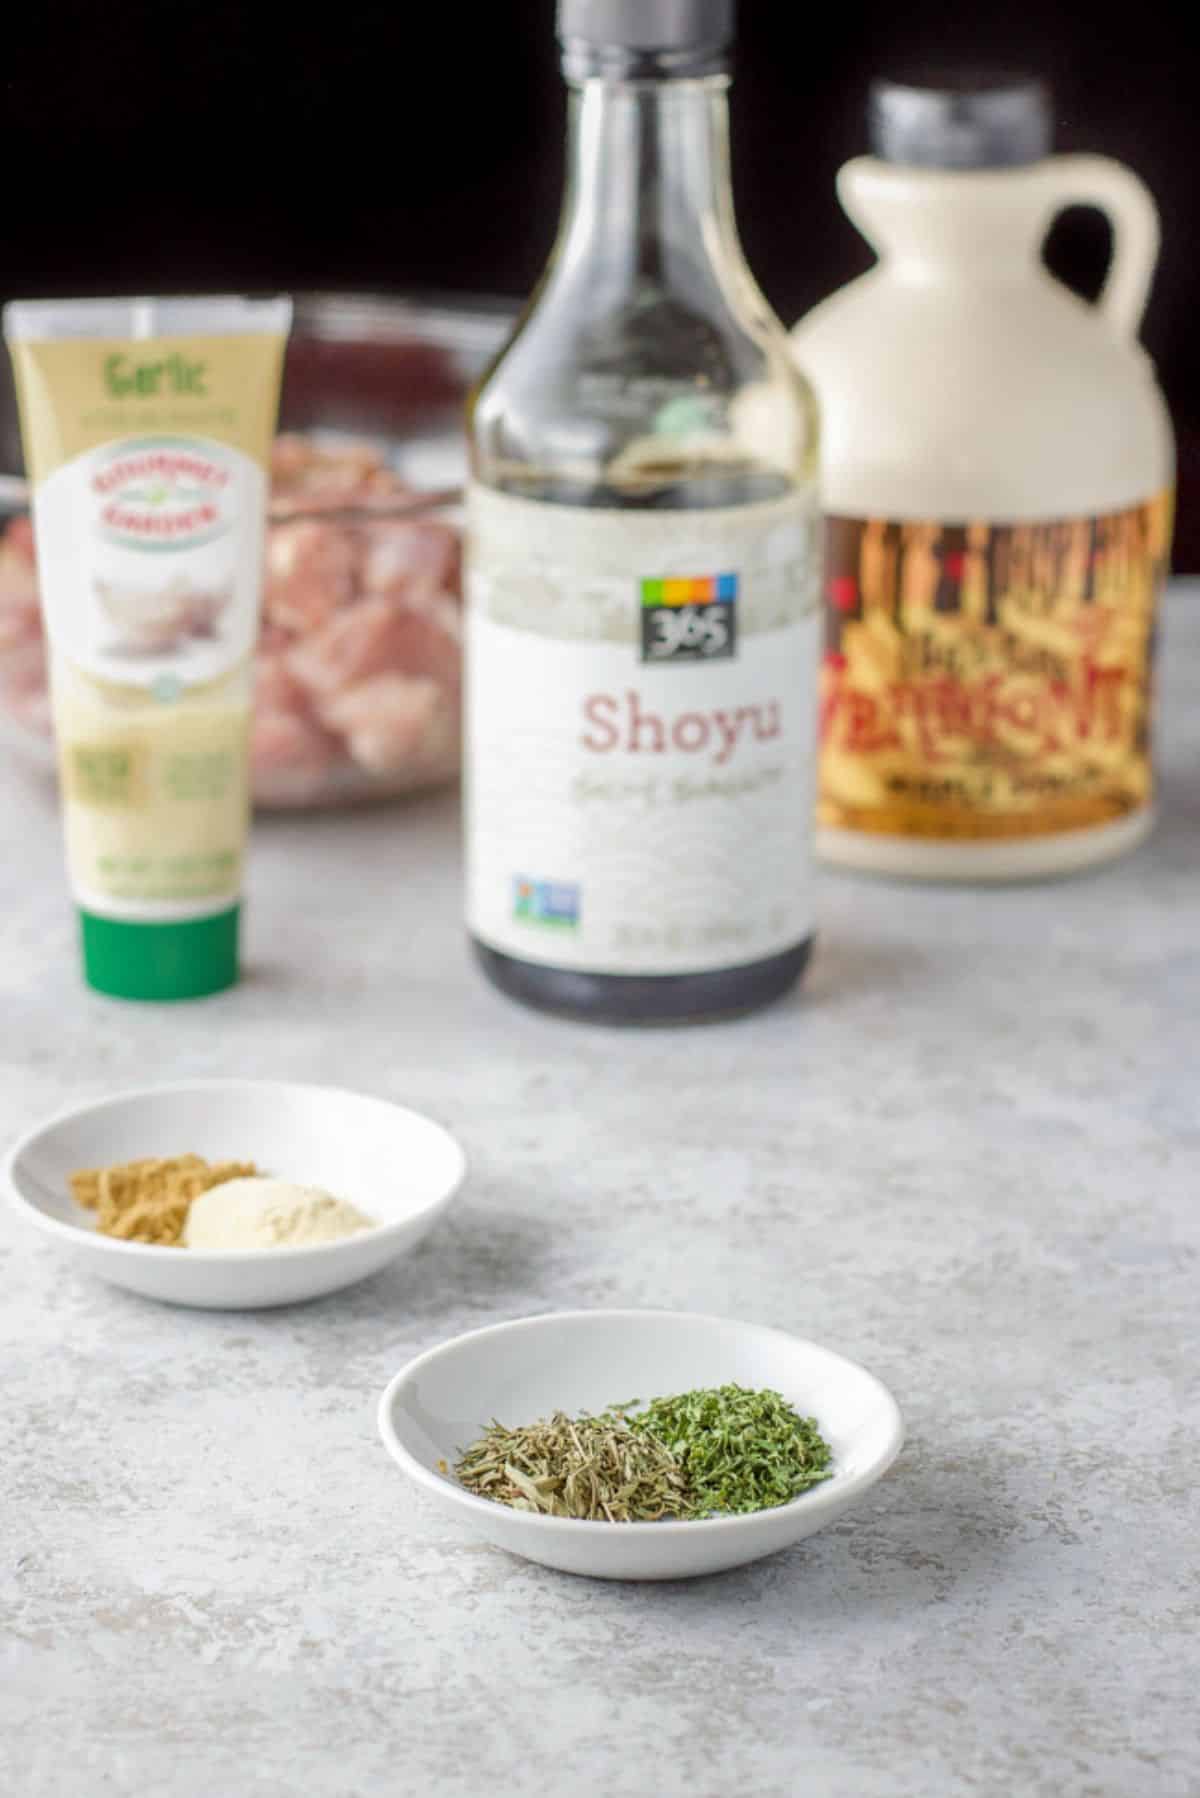
Gather the ingredients for the marinade – herbs and spices, soy sauce, and maple syrup.
Step two
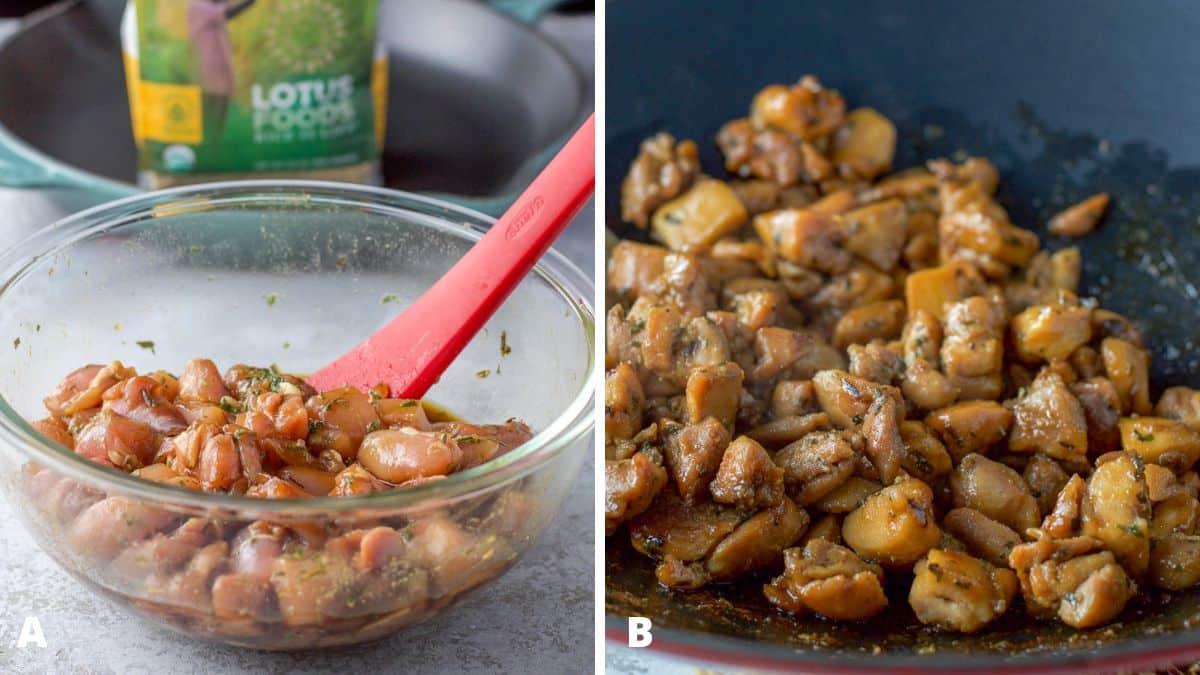
Add all the above ingredients to the bowl of chicken and mix with a rubber spatula. Cover and place the bowl in the refrigerator and marinate for 30 minutes to an hour. (A)
Step three
Meanwhile, prepare jasmine rice according to the package directions. I buy the Lotus Foods organic brown jasmine rice. The cooking directions on the package call for 1 cup of rice, 1.75 cups of water, and 1/4 teaspoon of salt. Rinse rice well, put both the rice and water in the pan, and bring to a boil. Lower to a simmer and cook for 30 minutes.
Marinade done
Take the marinated chicken out of the refrigerator. (A)
Step four
Heat a wok or large sauté pan on medium heat. Add one tablespoon of marinade and once that heats up, add chicken and sauté for 8 – 10 minutes. (B)
Scoop the chicken out of the pan and set aside.
Heat the bowl
Step five
Place the dolsot bowls in the oven and set the temperature to 425°F. It’s essential not to change the temperature of the bowl quickly, as this can cause it to crack.
Once the oven comes to temperature, set the timer to 10 minutes.
Step six
Once the timer beeps, turn the oven off, LEAVE the bowl in the oven and set the timer to 10 minutes.
Would you like to save this recipe?
Don't worry, I promise not to spam you.
Time for Vegetables
Step seven
Meanwhile, gather the vegetables – bok choy (I recommend baby bok choy for its tenderness), onion, red bell peppers, and mushrooms.
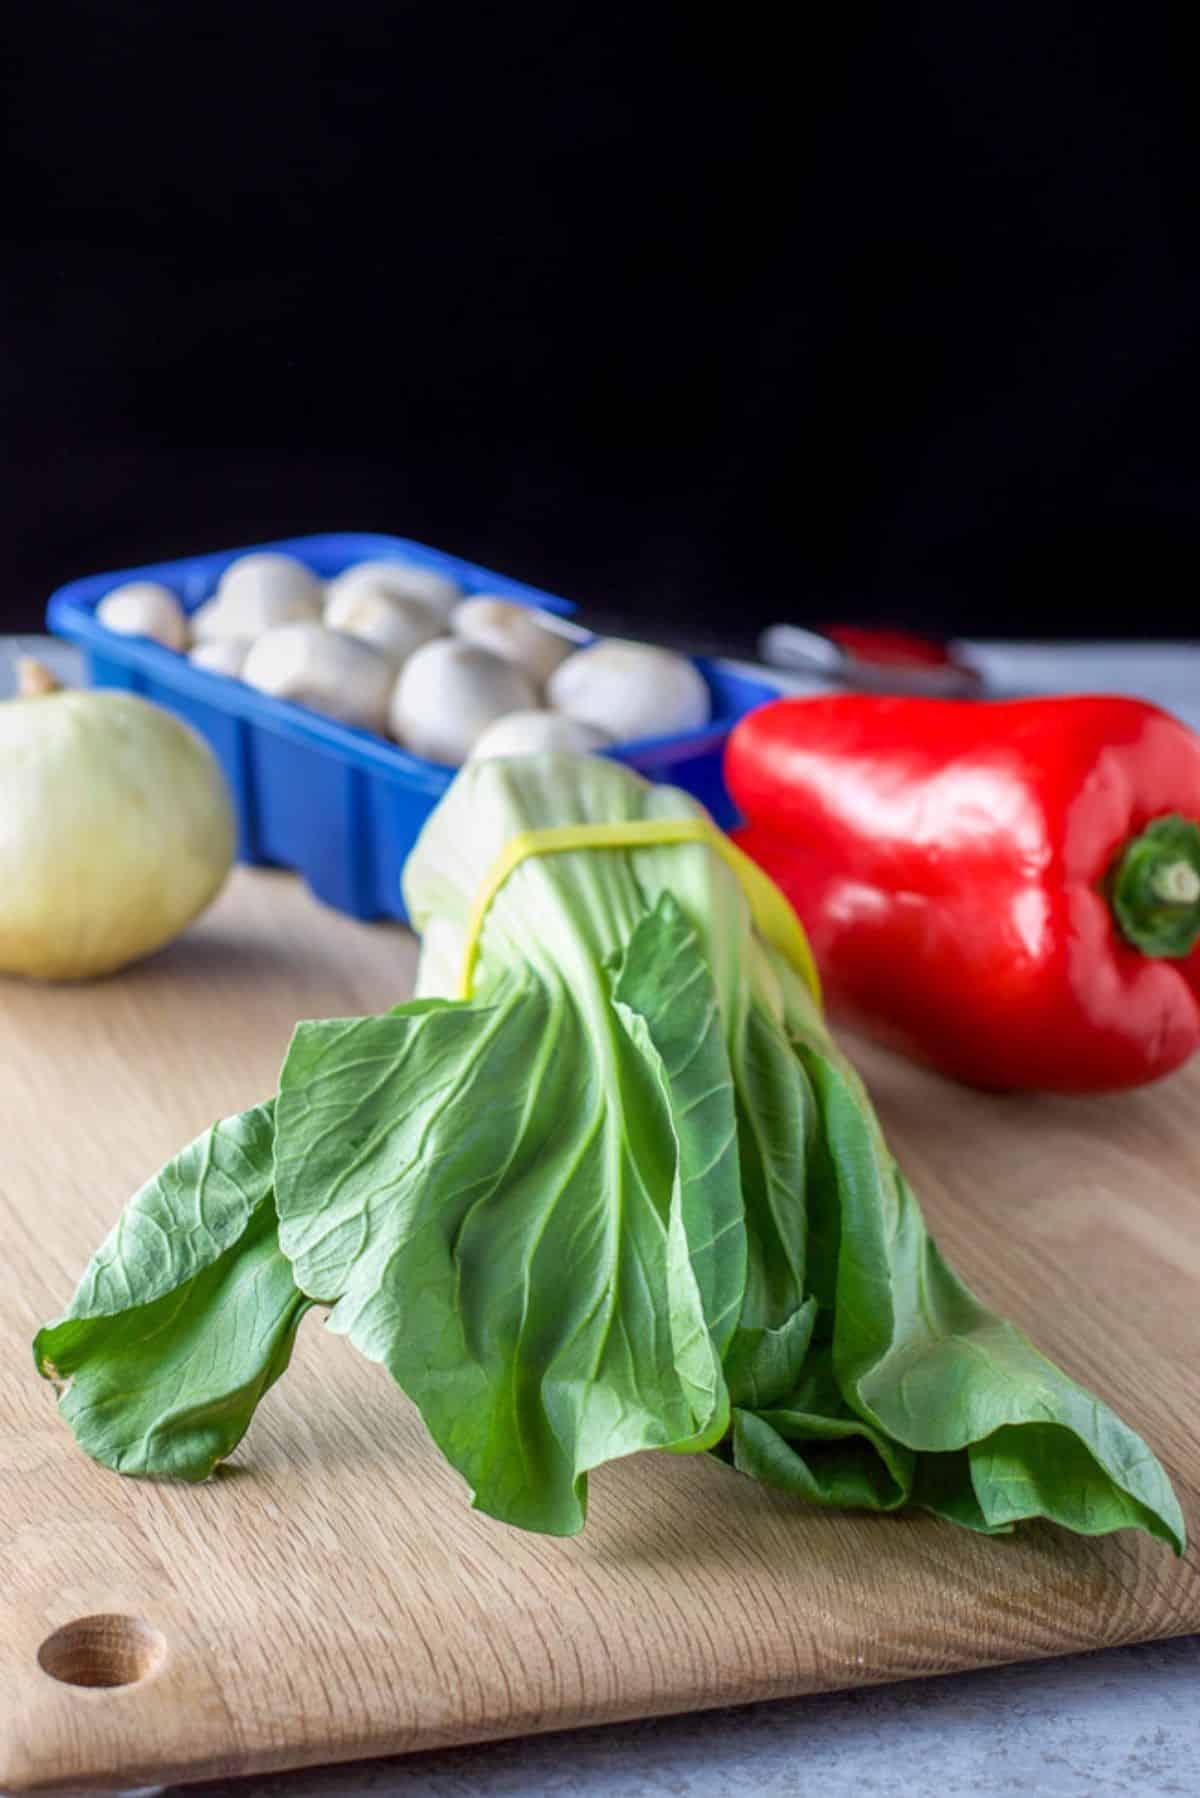
Step eight
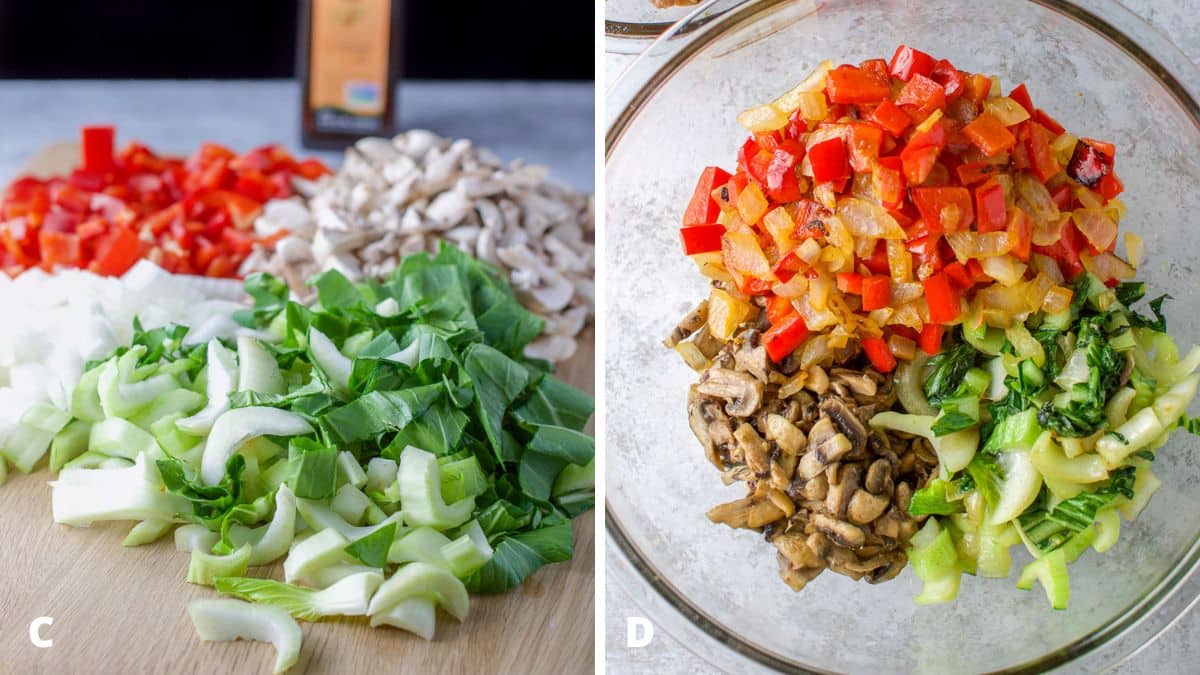
Wash the vegetables well and chop them into chunks. (C)
When washing the bok choy, either don’t submerge the leaves directly under water or ensure they are thoroughly dried afterwards. Otherwise, the veggies will be swimming in water when you saute them.
Also, gather the sesame oil.
I use two woks to cook the veggies and I cook them in shifts. If you don’t own a wok, use two large sauté pans.
Step nine
Heat the pan you used to cook the chicken on medium, and once it heats up, add 1 tablespoon of oil. Once that heats up, add the onion, bell pepper, garlic paste, and 1/4 teaspoon of salt to one pan and sauté for 12 minutes. Spoon into a large bowl, keeping it separate.
Step ten
Meanwhile, heat the other pan on medium, add the sesame oil until it heats up, and add the bok choy, salt, and garlic paste. This vegetable cooks fast, so it should be done within 5 minutes. Don’t turn the heat off under the pan, but remove the bok choy. I set mine aside in a large bowl, giving it its own space.
Step eleven
Add a little more oil to the pan, then add mushrooms, garlic paste, and a pinch of salt, and sauté for around 5 minutes. Spoon them into the bowl with the rest of the vegetables, keeping them separate. (D)
Putting it together
The rice should be done. Fluff it up a bit. (F) The rest of the photos in the collage below were taken in my kitchen with the overhead light on, which gives them a yellowish cast.
Step twelve
By now, the stone bowl is ready to take out of the oven. Place it on one of the burners and turn the heat to medium. (G)
Step thirteen
Pour a little sesame oil in the stone pot and use a silicone brush to thoroughly distribute the oil up the sides of the bowl. (H)
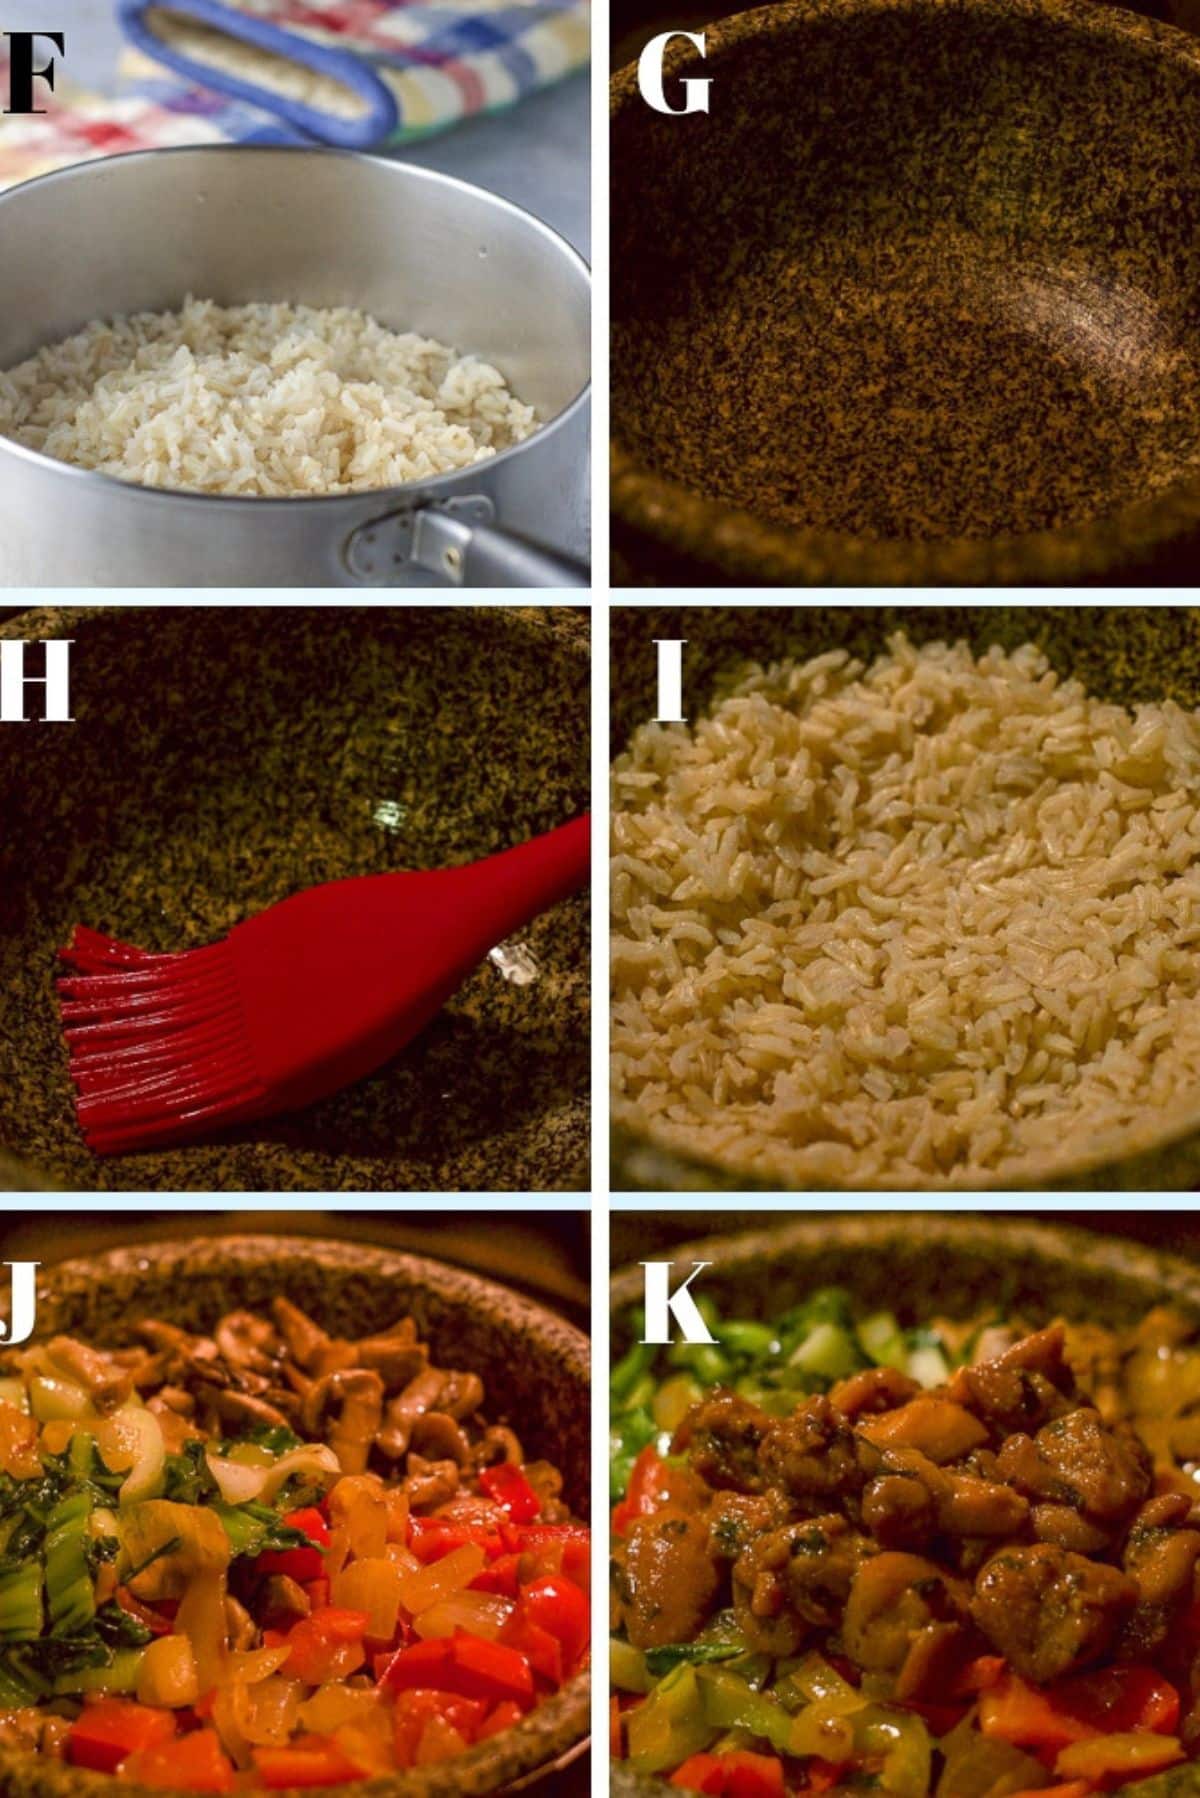
Step fourteen
Spoon rice in the bowl, spread it up the sides and flatten it against the bowl. (I)
Step fifteen
Spoon the veggies on the rice. (J)
Step sixteen
Add the chicken on top of the vegetables, right in the middle. (K)
Step seventeen
Set the timer for 15 minutes for crackily rice, or 10 minutes if you want softer rice.
Time for the Eggs
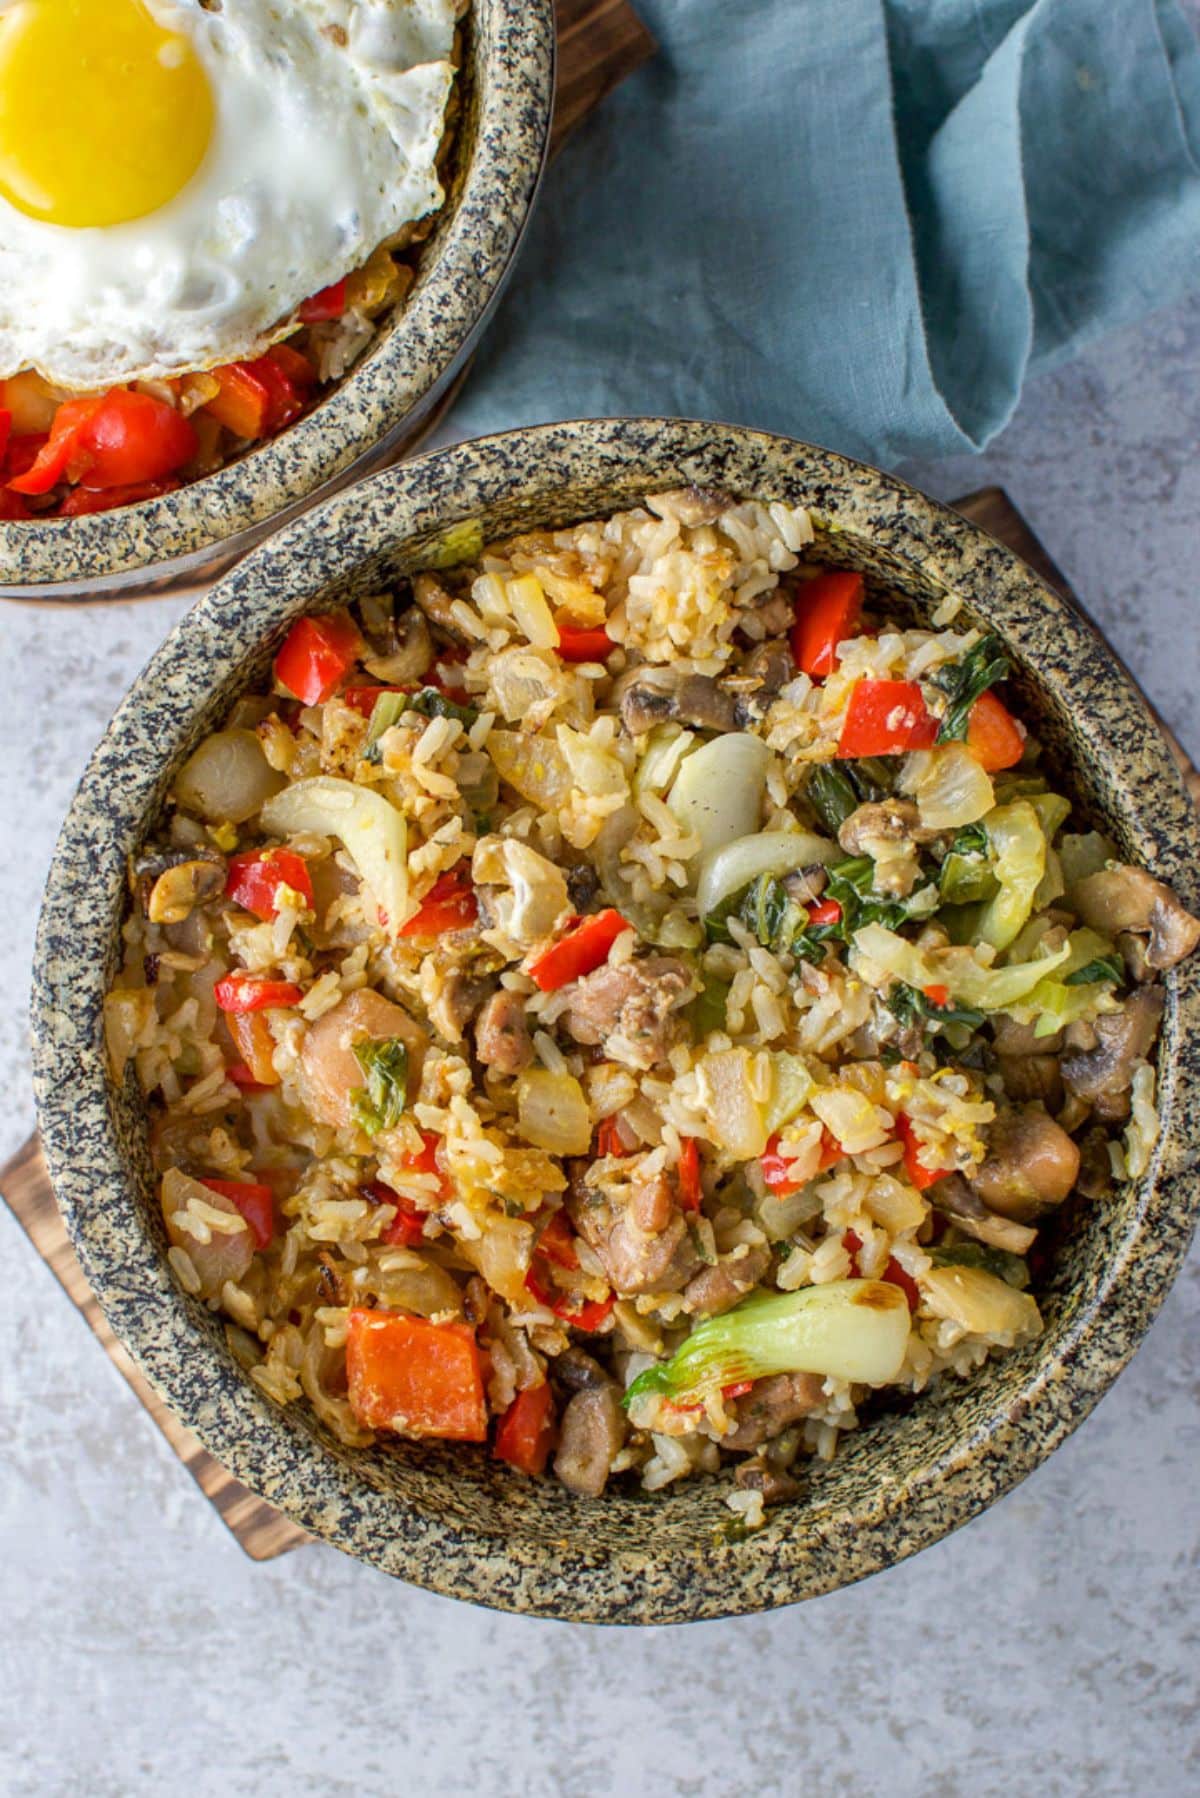
You can either fry an egg sunny side up OR you can crack the egg directly into the bowl, which incidentally, is my preferred way to cook it.
I enjoy serving the dolsot bibimbap to my guests with the fried egg. (E)
But Christopher and I enjoy mixing in a raw egg. (F)
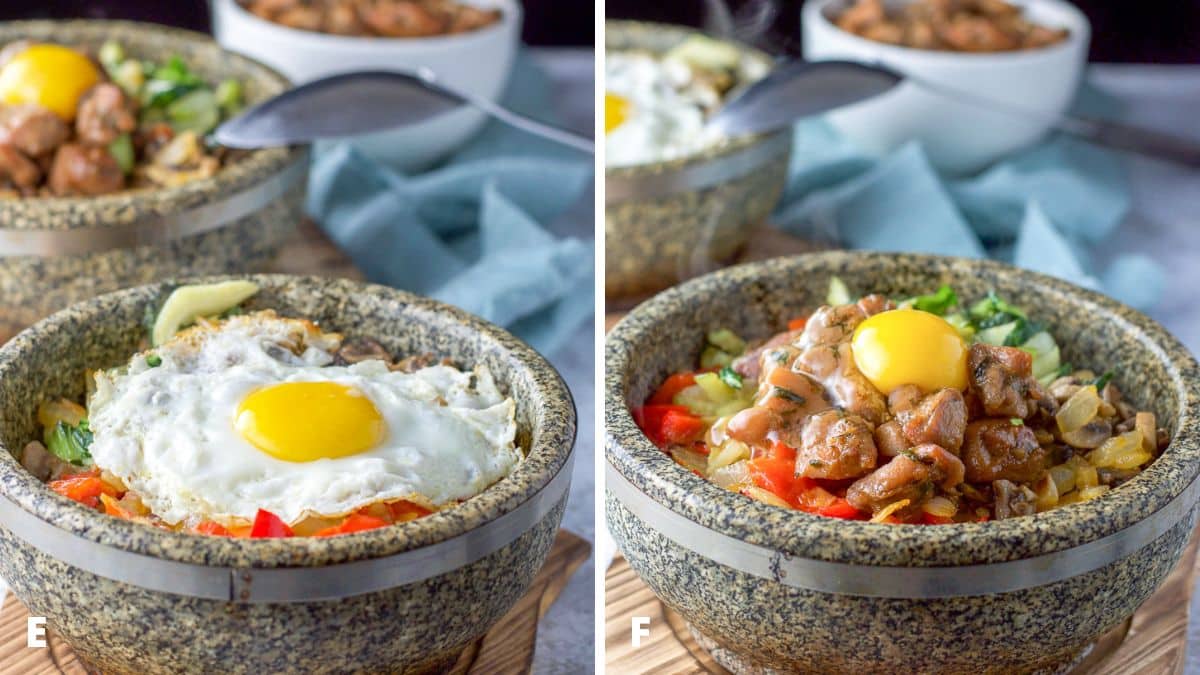
Next, I take a large spoon and mix the egg in the BBB, making sure the egg has fully cooked.
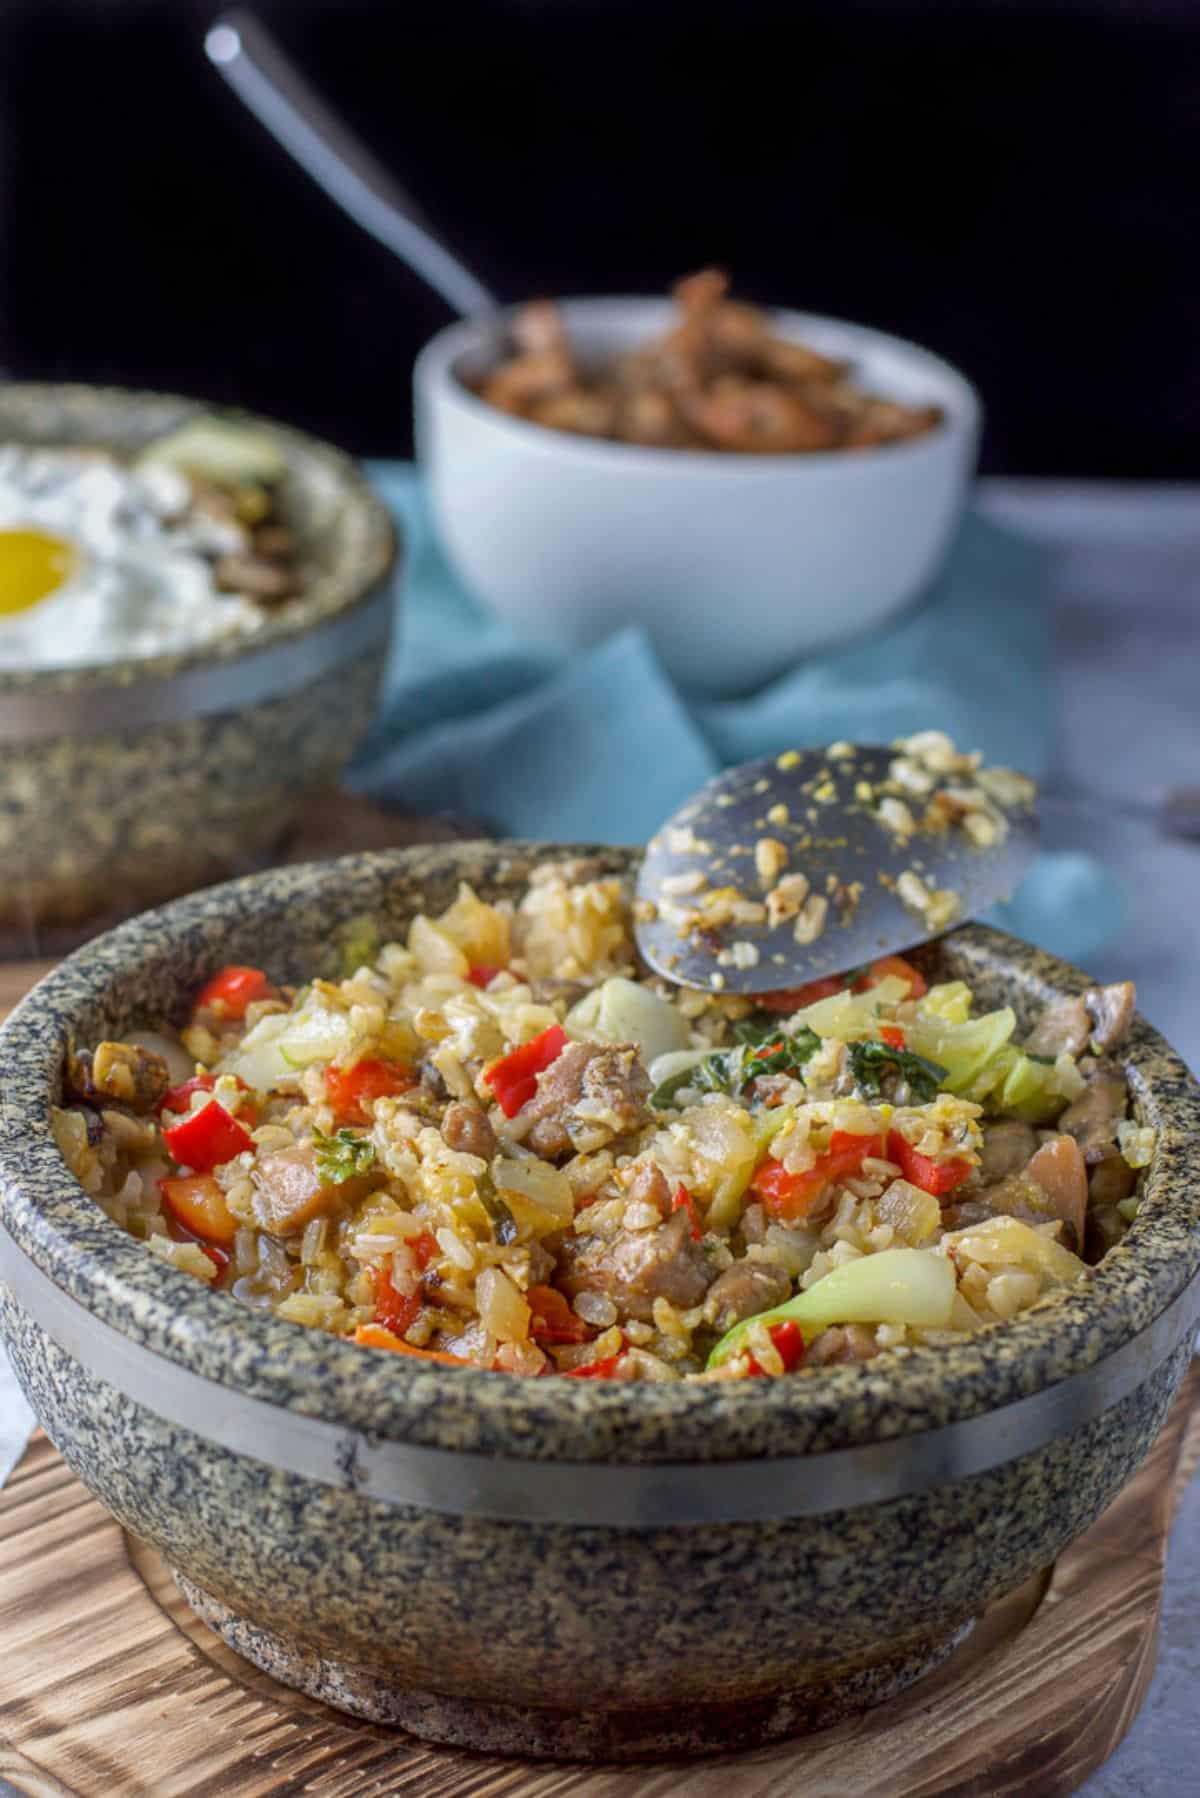
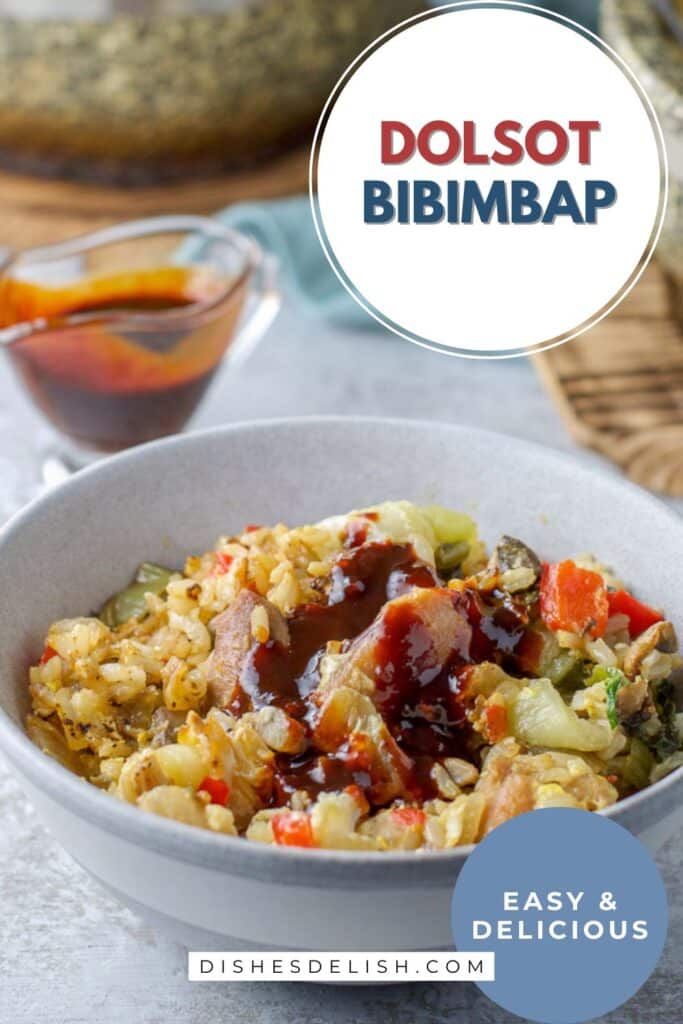
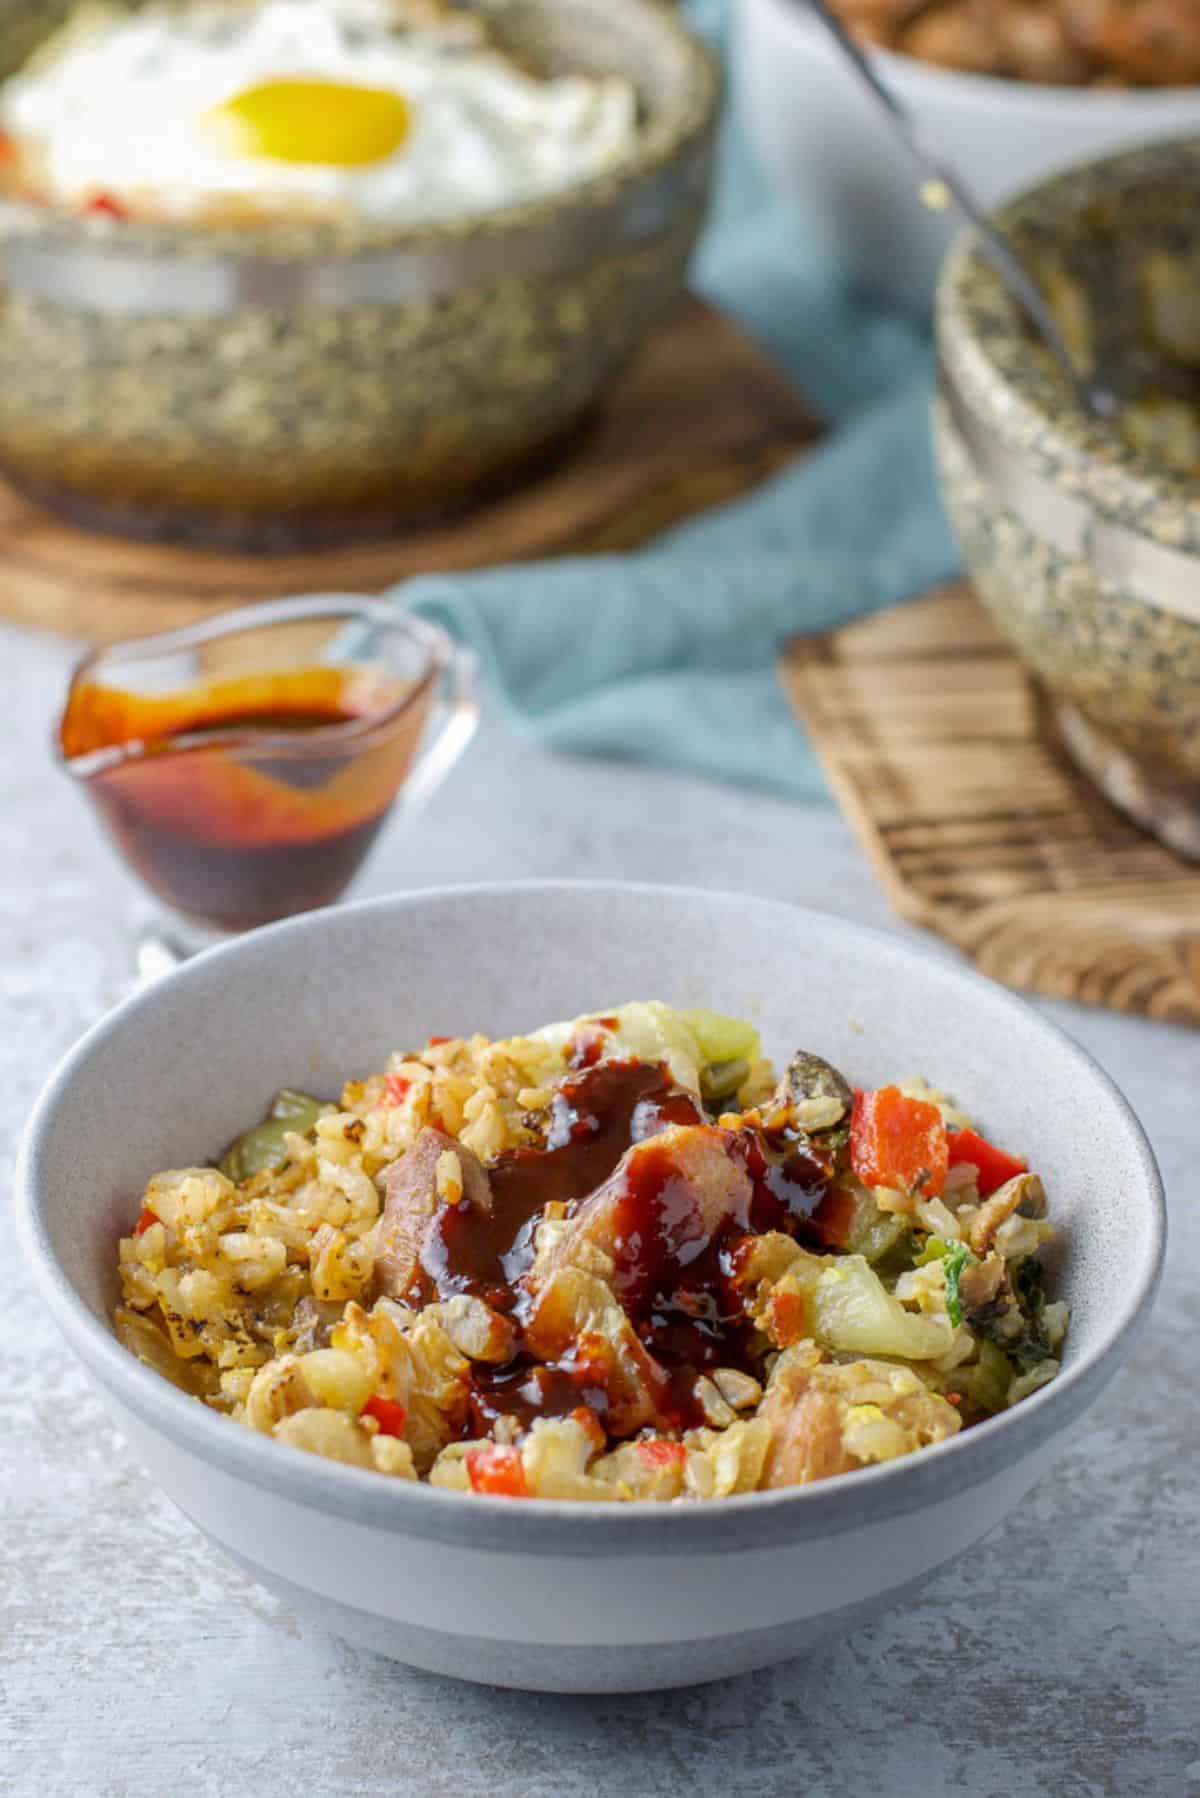
I spoon the BBB in some bowls and dribble Gochujang sauce or another bibimbap sauce on top.
Delicious!
This Gochujang sauce is quite spicy so I mix the sauce in before eating it. Christopher finds the sauce way too spicy, so he eats his BBB plain or with a little soy sauce.
I hope you enjoyed this dolsot bibimbap recipe.
And as always, may all your dishes be delish!
If you’ve tried this recipe, I’d love the know what you thought about it in the comments below. I love hearing from you! You can also FOLLOW ME on FACEBOOK, TWITTER, INSTAGRAM and PINTEREST to see more of my delicious food and delightful cocktails!
Dolsot Bibimbap
Ingredients
- 5 chicken thighs (5 or 6 – boneless, skinless and cut into medium chunks)
- 1 cup rice (I use Lotus Foods, organic brown Jasmine rice)
- 1.75 cups water (to cook rice – your brand may have different measurements)
Marinade
- .25 cup soy sauce
- .25 cup maple syrup
- 1 teaspoon garlic powder
- 1 teaspoon garlic paste
- .50 teaspoon tarragon (dried)
- .50 teaspoon ginger (dried)
Vegetables
- 3 tablespoons sesame oil (divided – 1 tablespoon per veggie)
- 1 large red bell pepper (chopped small)
- 1 large onion (chopped small)
- 1 medium bok choy (1 or 2 – chopped)
- 10 ounces mushrooms (chopped small)
- 3 teaspoon garlic paste (1 teaspoon per each veggie)
- 1 teaspoon salt (divided, 1/4 teaspoon per vegetable and chicken)
- 2 tablespoon sesame oil (divided – 1 tablespoon per bowl)
- 2 eggs (1 per bowl)
Addon
Instructions
- Place all the marinade ingredients (soy sauce, maple syrup, garlic powder, garlic paste, tarragon, and ginger powder) in a bowl and whisk them together..25 cup soy sauce, .25 cup maple syrup, 1 teaspoon garlic powder, 1 teaspoon garlic paste, .50 teaspoon tarragon, .50 teaspoon ginger
- Add chicken and mix until the marinade covers the chicken. Cover and place in the refrigerator for 30 minutes to an hour.5 chicken thighs
- Meanwhile, make the rice according to the package.1 cup rice, 1.75 cups water
- Place stone bowls in oven and set the oven for 425 F. Once it comes to temperature, set timer for 10 minutes. Once it beeps, turn off oven and set timer for 10 minutes. If all the vegetables aren't done cooking, you may leave the bowls in the oven.
- Heat a large sauté pan or wok on medium, add 1 tablespoon marinade and once that heats up, add the chicken, and 1/4 tsp salt, and sauté for 10 minutes, stirring every minute. Set aside.
- Heat another sauté pan or wok on medium add 1 tablespoon oil and once that heats up, add onion, pepper, 1 teaspoon garlic, and 1/4 teaspoon salt, and sauté for 10 minutes. Set aside.3 tablespoons sesame oil, 1 large red bell pepper, 1 large onion, 3 teaspoon garlic paste, 1 teaspoon salt
- In the pan you sautéed the chicken in add 1 tablespoon of oil and once that heats up, add bok choy,1 teaspoon garlic, and 1/4 teaspoon salt, and sauté for 4 minutes. Set aside.1 medium bok choy
- In the pan the onion and pepper was in, add 1 tablespoon of oil and once that heats up, add mushrooms, 1 teaspoon garlic, and 1/4 teaspoon salt and sauté for 5 minutes. Set aside.10 ounces mushrooms
- Take stone bowls out of the oven, set them on the burners and turn the heat under them on medium.
- Add 1 tablespoon of sesame oil to each stone bowl and take a silicone brush and distribute oil up the sides of the bowls.2 tablespoon sesame oil
- Add spoonfuls of rice to the bowls and spread it up the sides of the bowls, flattening it with the bowl of the spoon
- Add the vegetables individually to the bowl keeping them in the quadrants. This is for presentation since you're just going to mix it together with a spoon when you serve it.
- Add a few spoonfuls of chicken on the vegetables in the middle.
- Set the timer for 15 minutes for crunchy rice or 10 minutes for softer rice.
- Either fry the eggs sunny-side up or add them raw to the bowls after you place the BBB on the table.
- Use a large serving spoon to mix the BBB until the egg is cooked (if you’re using raw eggs).
- Add Gochujang sauce for extra spice, or soy sauce, or eat plain. Enjoy.
Equipment


Would you like to save this recipe?
Don't worry, I promise not to spam you.
Very excited to come across this meal – it is my best friend’s favourite also! She is going to love when I make this for her 🙂
I hope she likes it Alexandra! I’ve been making it like this for over a year, so it’s tried and true.
This looks super yummy and unique! I’ll have to give it a try!
It’s so yummy, Caitlin! I hope you enjoy it!
This dish is perfect when I’m craving it! I love that I can make it right at home. It’s very yummy.
Thanks so much Sharon! I appreciate it!
This dish is packed with flavor! YUM!
It really is Shanika! Thank you for your comment!
Wow this dish was delicious and flavorful!
Thanks so much Sharon! 🙂
I’m totally with you on the julienned vegetables. I just don’t have the patience for that. I love me some bibimbap, though! It’s such a flavorful, comforting dish. Great simple recipe that I’ll make again!
Thanks so much Danielle! I’m glad you’re with me on the no julienned vegetables. 🙂
I love the flavors, the spiciness, the veggies mixed together with the rice. And I like that you make this recipe “user friendly” and not too much of an effort.
Thanks, Nicoletta!
This dish is right up my alley!! The egg on top is the perfect finishing touch. I’ve never had bibimbap before, but this was so good!
Thank you, Tammy!! I’m glad you enjoyed it.
I fell in love with Bibimbap when my Korean friend made me try her homemade version, but I never attempted making it on my own. Your recipe is incredibly detailed and it was so easy to make 🙂
Thanks, Jessica! I appreciate your comment!
I never had Bibimbap! This looks AMAZING!
Thanks, Gina!! 🙂
This was such a delightful comfort food. This recipe easy to make from your instructions ! Thank you for sharing !
Thank you Analida! It is surely comforting! 🙂
Wowie this recipe is awesome!!!! Everything I ever want to know about Bimibap so clearly explained! And your instruction and photos really help! Thanks so much for sharing Elaine :).
Thanks so much Daniela! It’s a fun and delicious way to try something new! Or to make something you just get in restaurants.
Goodness me, this type of cooking takes my breath away every time I see something like this on tele shows. I’m so happy to see you have cooked this bibimbap in a stone bowl. That bibimbap looks out of the world. HEAVEN!
Thanks Jo! The bowls, (in my opinion) are crucial. It makes it feel so authentic and keeps the food nice and hot!
Hi!Where can I get authentic stone bowls like this. Which stone do you prefer?
Thank you for posting these yummy recipes!!
I bought mine on Amazon. I like the bigger one which is 32 ounces, I believe. It’s a fun bowl and makes the rice so crispy.